如何在 Ubuntu 上用 Yocto 创建你自己的 Linux 发行版
========================================
### 本文内容
本文主要聚焦在如何使用 Yocto 在 Ubuntu 上创建一个最小化的 Linux 发行版。Yocto 项目在嵌入式 Linux 的世界非常著名,这是因为它用起来非常灵活、方便。Yocto 的目标是为嵌入式软硬件开发商创建自己的 Linux 发行版。本文我们将会创建一个可以运行在 QEMU 上的最小化的 Linux,并且在 QEMU 上实际运行。
### 开发机的基本条件
* 最少 4-6 GB 内存
* 最新版的 Ubuntu 系统(本文使用了 16.04 LTS)
* 磁盘剩余空间至少 60-80 GB
* 在创建 Linux 发行版之前先安装下面的软件包
* 下载最新的 Yocto(Poky 是其最小开发环境)稳定分支
```
apt-get update
```
```
apt-get install wget git-core unzip make gcc g++ build-essential subversion sed autoconf automake texi2html texinfo coreutils diffstat python-pysqlite2 docbook-utils libsdl1.2-dev libxml-parser-perl libgl1-mesa-dev libglu1-mesa-dev xsltproc desktop-file-utils chrpath groff libtool xterm gawk fop
```
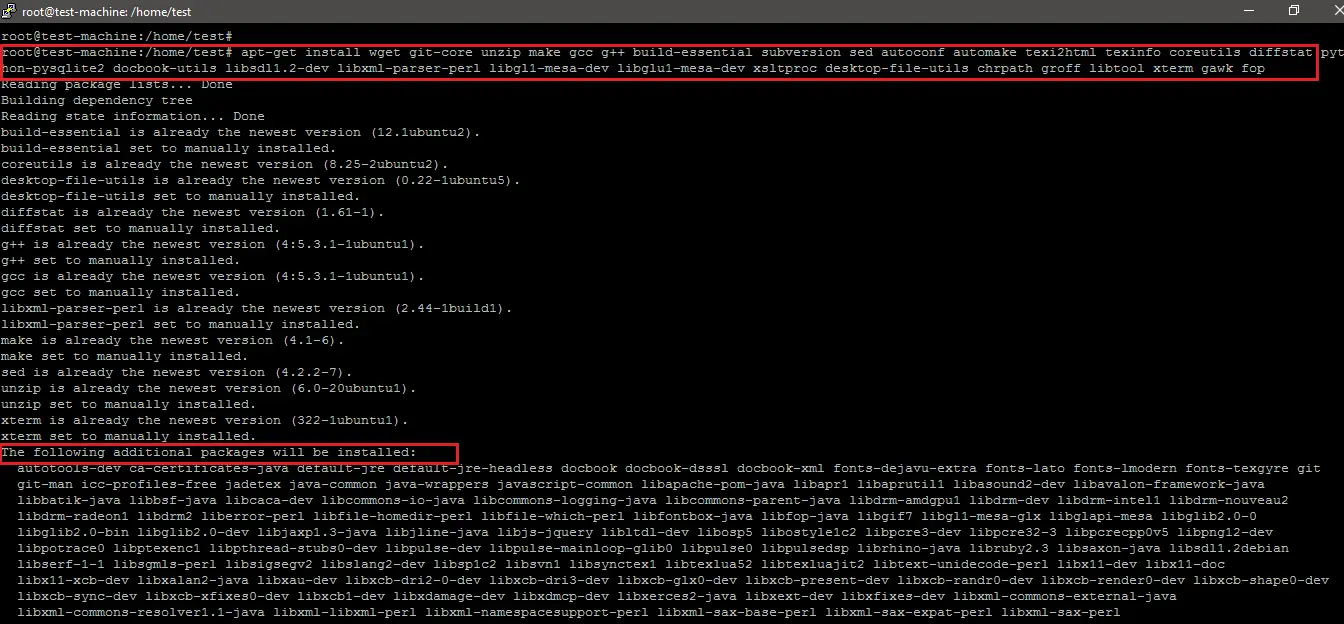
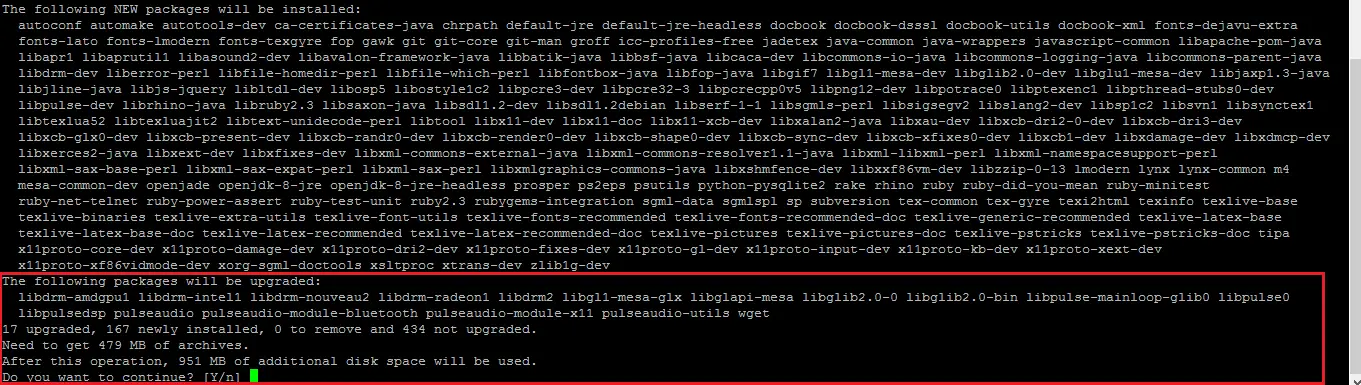
如下所示,开发环境要安装的软件包将近 1GB 大小。
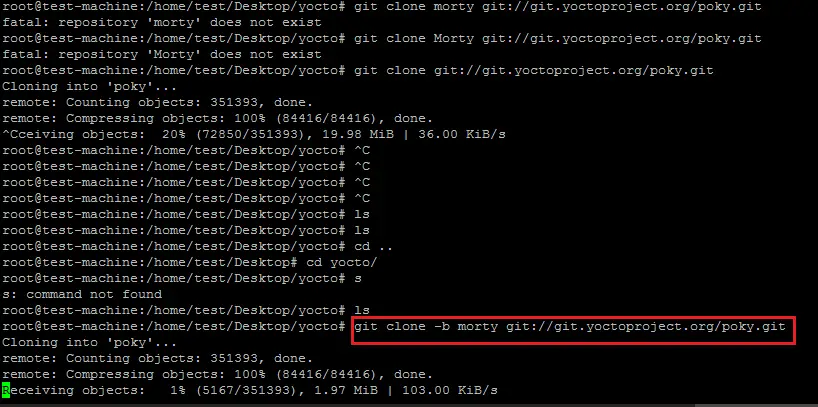
在这个教程中,系统上克隆的是 poky 的 `morty` 稳定分支。
```
git clone -b morty git://git.yoctoproject.org/poky.git
```
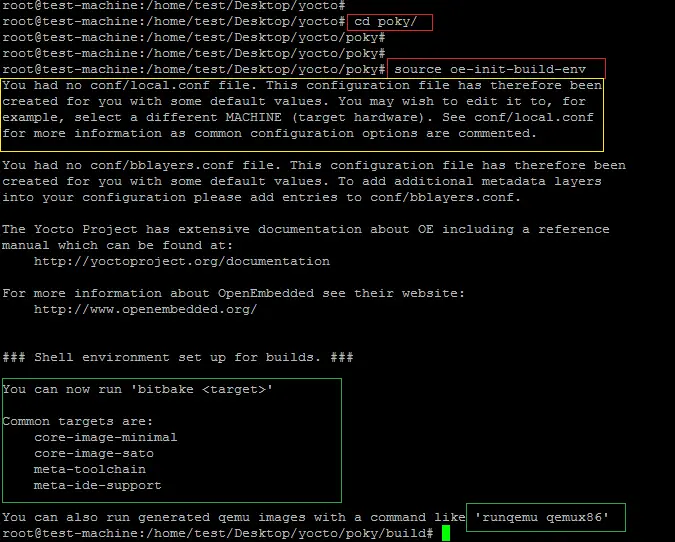
进入 `poky` 目录,然后运行下面的命令为 Yocto 开发环境设置(设置/导出)一些环境变量。
```
source oe-init-build-env
```
如下所示,在运行了 open embedded (oe) 的构建环境脚本之后,终端里的路径会自动切换到 `build` 目录,以便进行之后行发行版的的配置和构建。
上面的截屏展示了在 `conf` 目录下创建的文件 `local.conf`。这是 Yocto 用来设置目标机器细节和 SDK 的目标架构的配置文件。
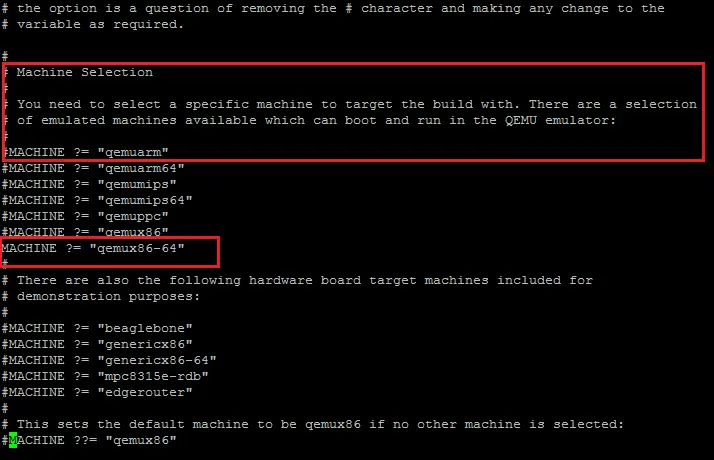
如下所示,这里设置的目标机器是 `qemux86-64`。
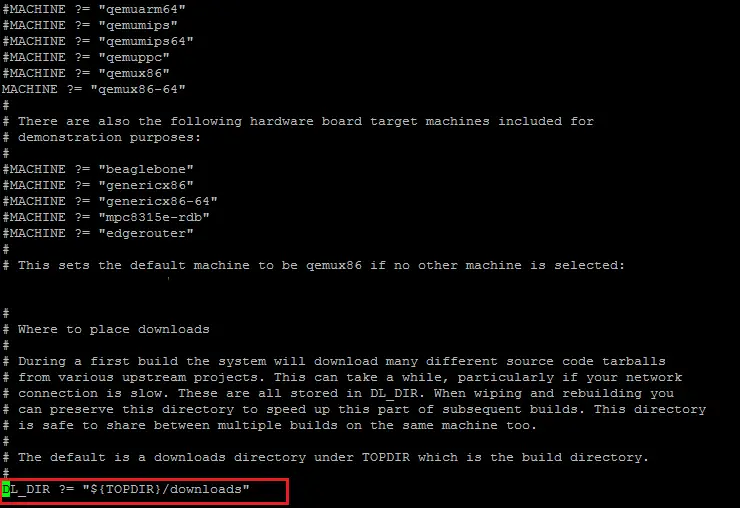
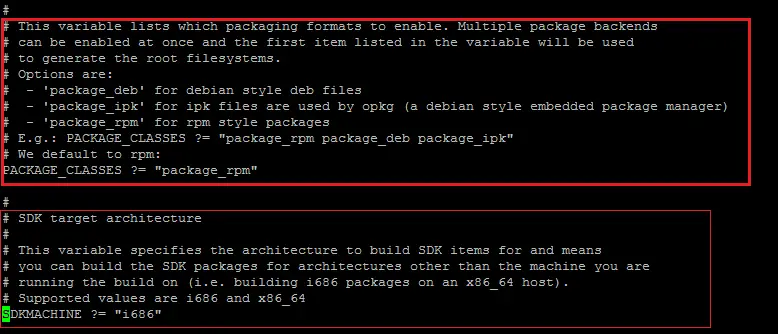
如下面截图所示,在 `local.conf` 中取消下面参数的注释符号。
```
DL_DIR ?= "${TOPDIR}/downloads"
```
```
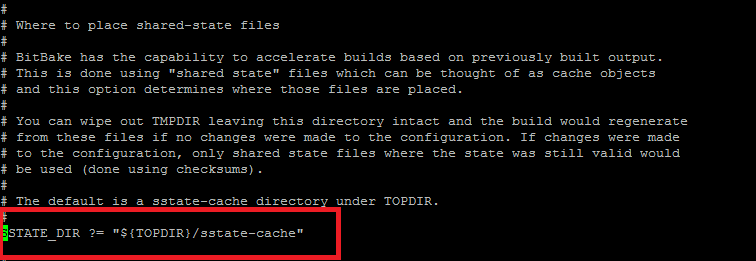
SSTATE_DIR ?= "${TOPDIR}/sstate-cache"
```
```
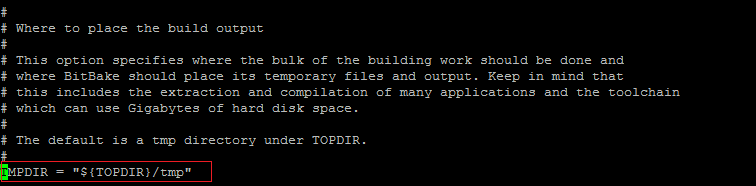
TMPDIR ?= "${TOPDIR}/tmp"
```
```
PACKAGE_CLASSES ?= "package_rpm"
SDKMACHINE ?= "i686"
```
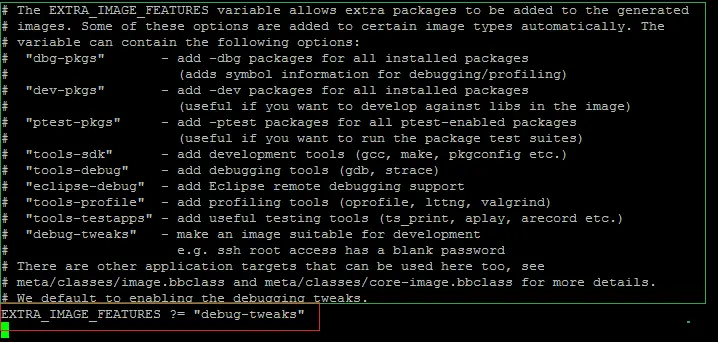
如下所示,在 `local.conf` 中为基于 Yocto 的 Linux 设置空密码和后续的一些参数。否则的话用户就不能登录进新的发行版。
```
EXTRA_IMAGE_FEATURES ?= "debug-tweaks"
```
我们并不准备使用任何图形化工具来创建 Linux OS,比如 `toaster` (`hob` 已经不再支持了)。
### Yocto 编译构建过程
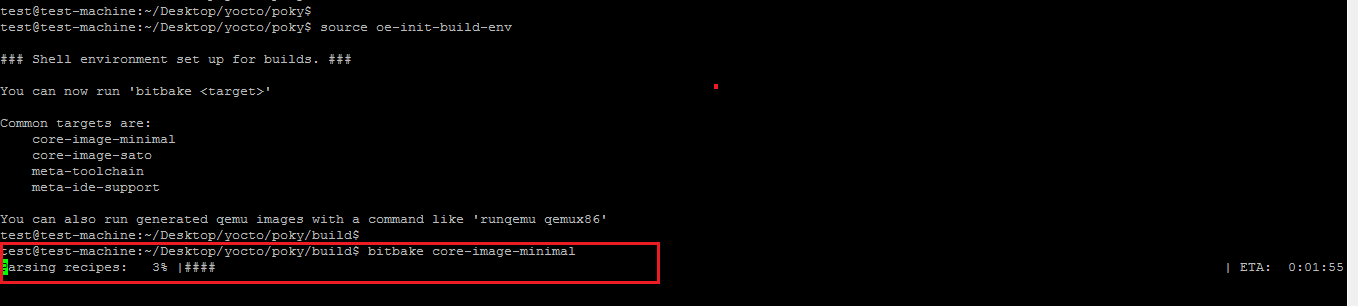
现在运行下面的 `bitbake` 工具命令开始为选定的目标机器下载和编译软件包。
```
bitbake core-image-minimal
```

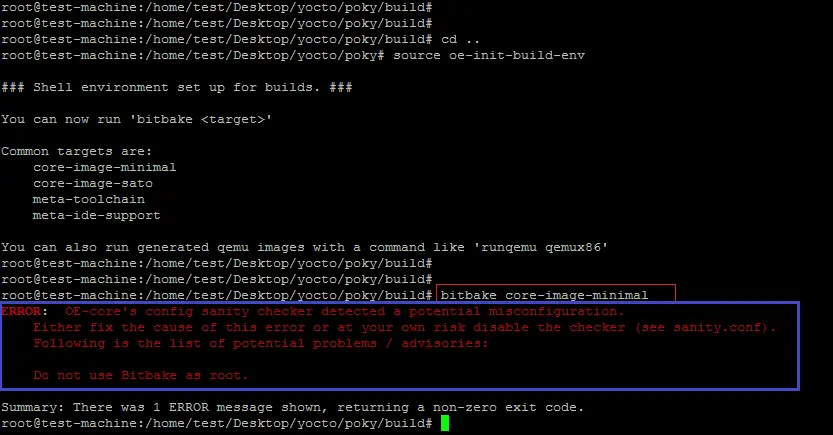
**非常重要的是要在普通 Linux 用户下运行上面的命令,而不是使用 root 用户**。如下面截图所示,当你在 root 用户下运行 bitbake 命令会产生下面所示的错误。
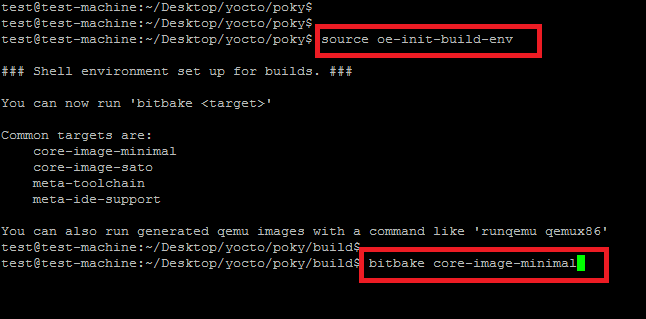
再一次运行导出环境变量的脚本(`oe-init-build-env`),重新执行相同的命令来启动下载和编译过程。
如下所示,构建脚本组件的第一步工作是解析配置(`recipe`)。
下面的截图展示了构建脚本的解析过程。同时也显示了用来构建你的新的基于 yocto 的发行版的构建系统的细节。
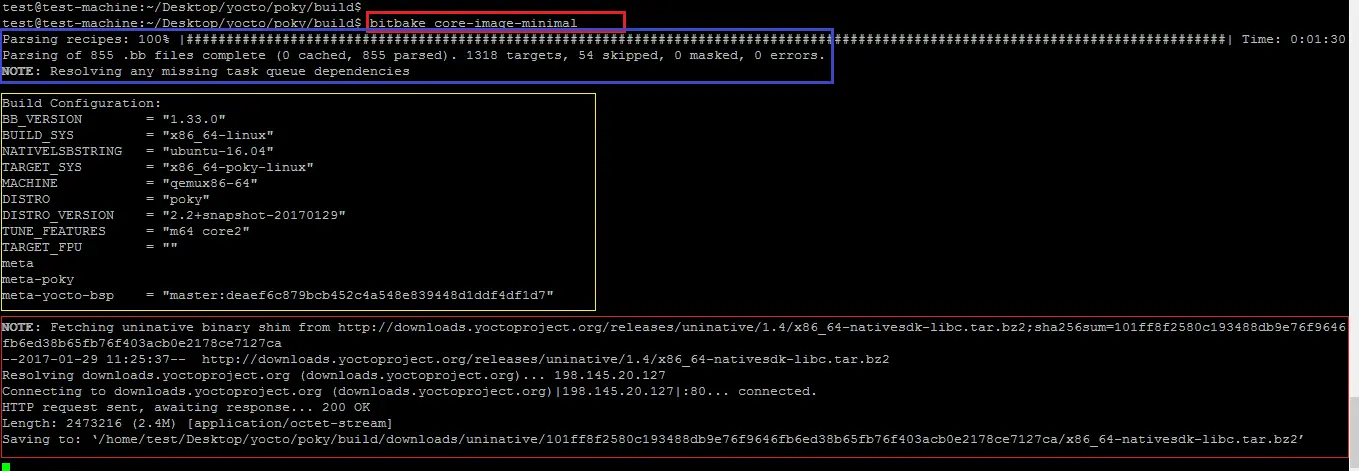
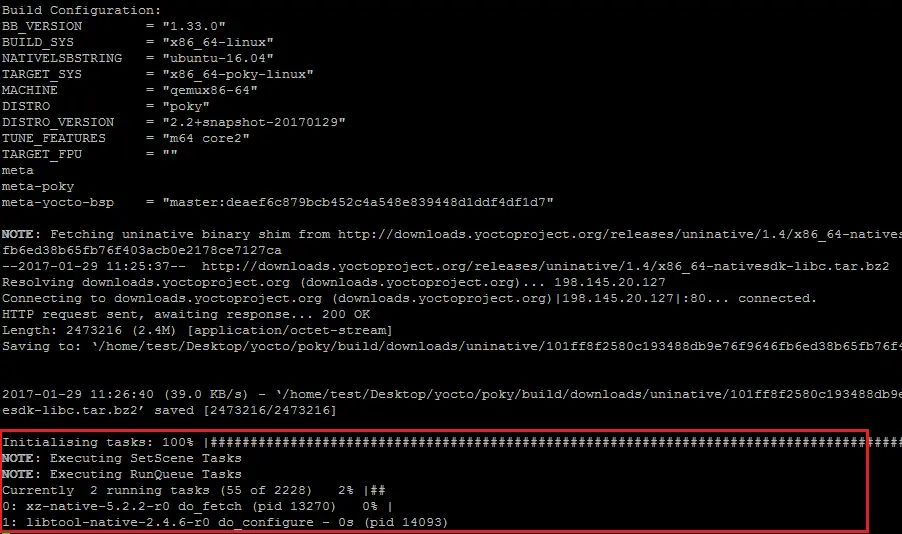
在下载了 SDK 和必要的库之后,下一步工作是下载并编译软件包。如下截图展示了为构建新发行版而执行的任务。这一步将会执行 2-3 小时,因为首先要下载需要的软件包,然后还要为新的 Linux 发行版编译这些软件包。
下面的截图表明了任务列表执行完毕。

为目标机器类型 `qemux86-64` 编译好的新镜像位于 `build/tmp/deploy/images/qemux86-64`:

如下所示,上面的命令如果运行在 `Putty` 上会产生一个错误。
通过 `rdp` 在 Ubuntu 平台上再次运行上面的命令。
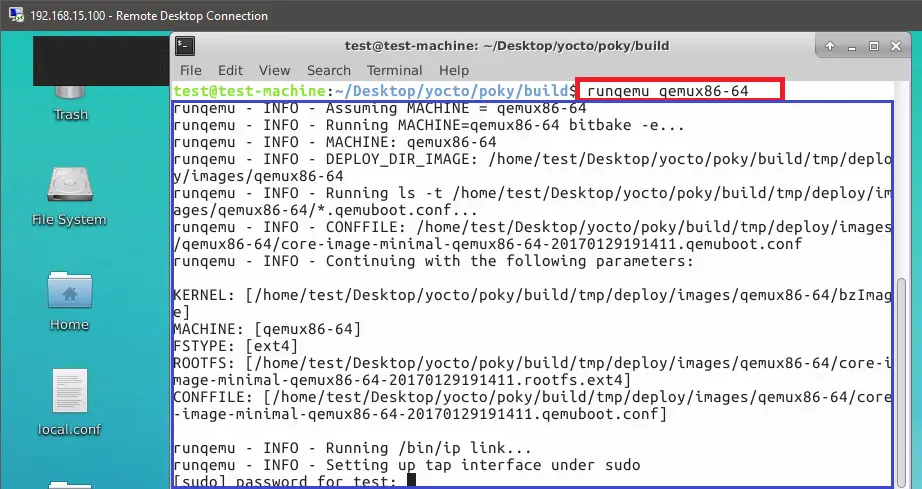
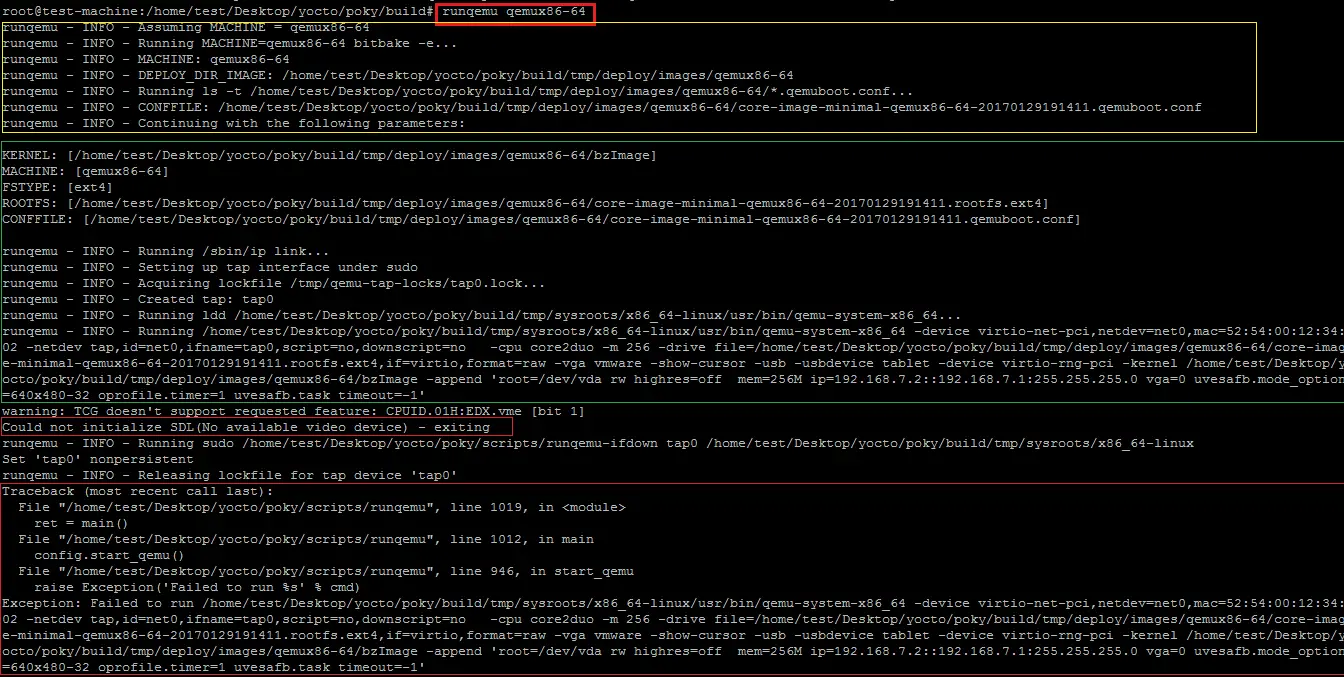
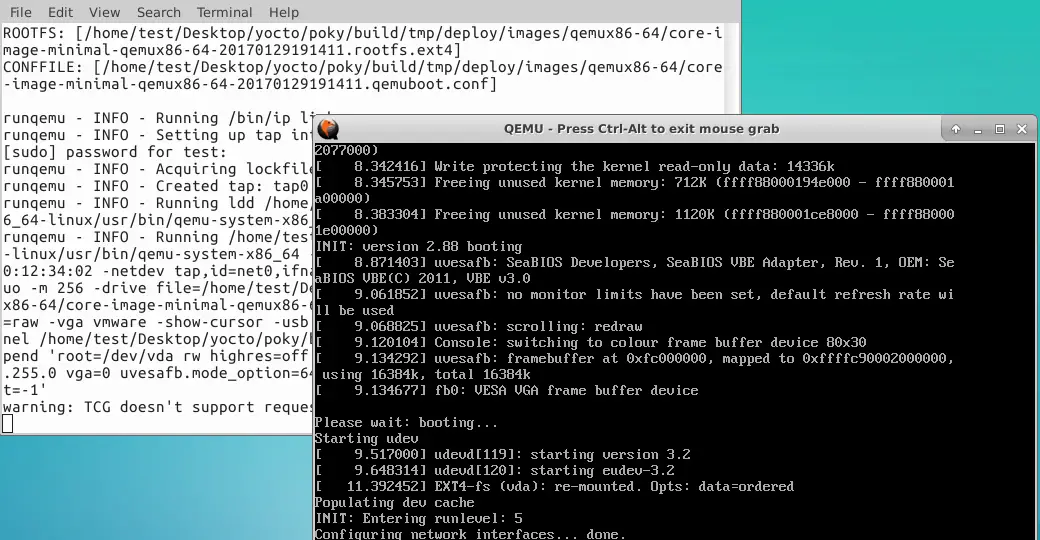
为运行新的基于 Yocto 的 Linux 发行版的 qemu 打开一个新屏幕。
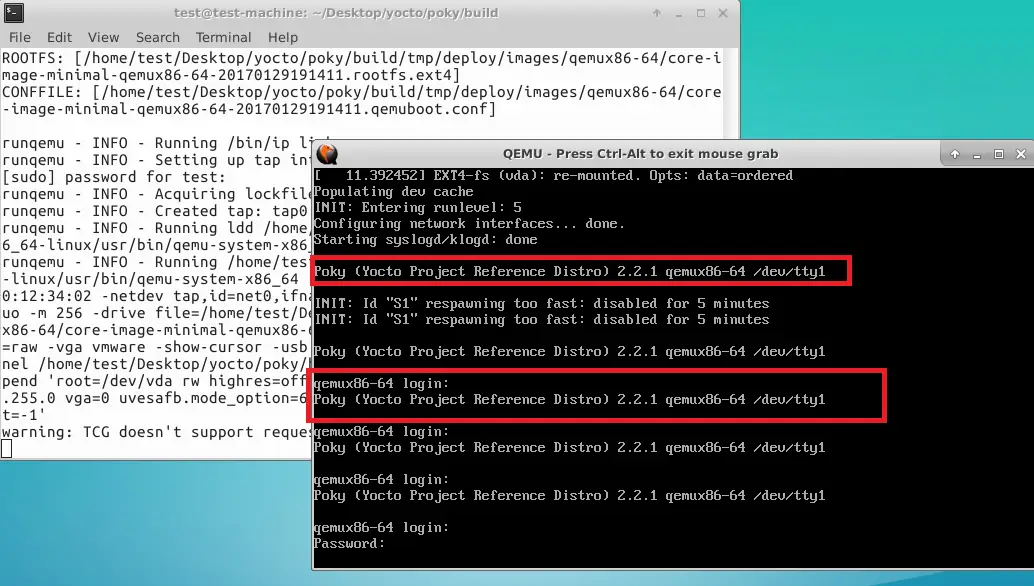
下面展示了新发行版的登录界面,同时也显示了使用的 yocto 项目的版本号。默认的用户名是 `root` ,密码为空。
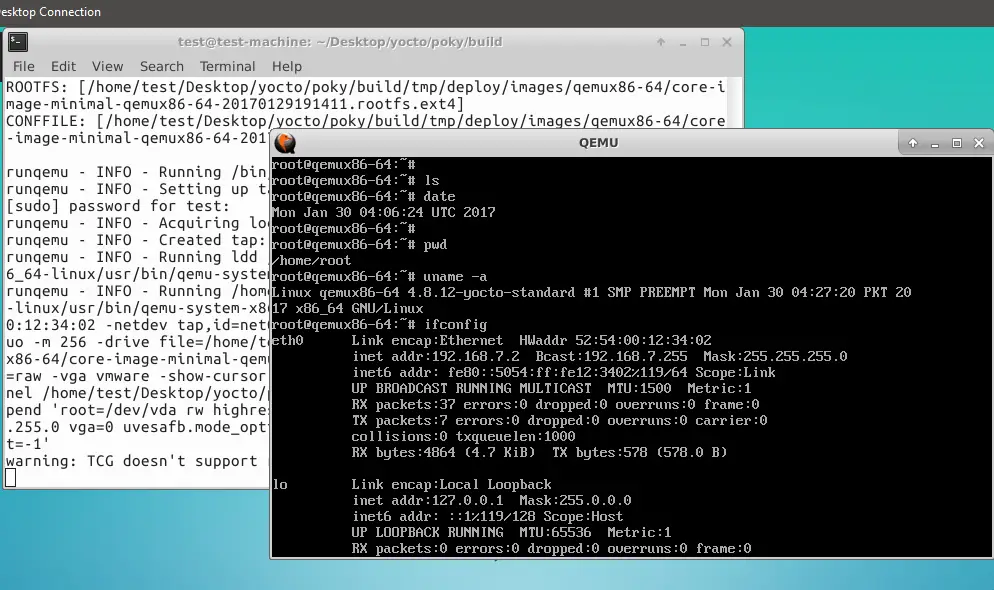
最后使用 `root` 用户名和空密码登录新发行版。如下截图所示,在这个最小版本的 Linux 上运行了基本的命令(`data` 、 `ifconfig` 和 `uname`)。
本文的目标是理解使用 Yocto 创建新的 Linux 发行版的过程。
--------------------------------------------------------------------------------
via: https://www.howtoforge.com/tutorial/how-to-create-your-own-linux-distribution-with-yocto-on-ubuntu/
作者:[Ahmad][a]
译者:[Ezio](https://github.com/oska874)
校对:[wxy](https://github.com/wxy)
本文由 [LCTT](https://github.com/LCTT/TranslateProject) 原创编译,[Linux中国](https://linux.cn/) 荣誉推出
[a]:https://www.howtoforge.com/tutorial/how-to-create-your-own-linux-distribution-with-yocto-on-ubuntu/
[1]:https://www.howtoforge.com/tutorial/how-to-create-your-own-linux-distribution-with-yocto-on-ubuntu/#prerequisites-for-the-development-machinenbsp
[2]:https://www.howtoforge.com/tutorial/how-to-create-your-own-linux-distribution-with-yocto-on-ubuntu/#yocto-compilation-and-building-process
[3]:https://www.howtoforge.com/images/how-to-create-your-own-linux-distribution-with-yocto/big/1-pre_requisite_packages-1.png
[4]:https://www.howtoforge.com/images/how-to-create-your-own-linux-distribution-with-yocto/big/2-pre_requisite_packages-2.png
[5]:https://www.howtoforge.com/images/how-to-create-your-own-linux-distribution-with-yocto/big/download_morty_of_yocto.png
[6]:https://www.howtoforge.com/images/how-to-create-your-own-linux-distribution-with-yocto/big/source_environment_script.png
[7]:https://www.howtoforge.com/images/how-to-create-your-own-linux-distribution-with-yocto/big/selected_target.png
[8]:https://www.howtoforge.com/images/how-to-create-your-own-linux-distribution-with-yocto/big/uncheck_Download_parameters.png
[9]:https://www.howtoforge.com/images/how-to-create-your-own-linux-distribution-with-yocto/big/uncheck_sstate_parametes.png
[10]:https://www.howtoforge.com/images/how-to-create-your-own-linux-distribution-with-yocto/big/tempdir_uncheck_paramerter.png
[11]:https://www.howtoforge.com/images/how-to-create-your-own-linux-distribution-with-yocto/big/sdk_and_package_selection.png
[12]:https://www.howtoforge.com/images/how-to-create-your-own-linux-distribution-with-yocto/big/extra-features_for_blank_password.png
[13]:https://www.howtoforge.com/images/how-to-create-your-own-linux-distribution-with-yocto/big/bitbake_coreimageminimal.png
[14]:https://www.howtoforge.com/images/how-to-create-your-own-linux-distribution-with-yocto/big/dont_user_as_a_root.png
[15]:https://www.howtoforge.com/images/how-to-create-your-own-linux-distribution-with-yocto/big/runniing_bitbake_again-normal_user.png
[16]:https://www.howtoforge.com/images/how-to-create-your-own-linux-distribution-with-yocto/big/parsing-receipe.png
[17]:https://www.howtoforge.com/images/how-to-create-your-own-linux-distribution-with-yocto/big/output_of_parsing.png
[18]:https://www.howtoforge.com/images/how-to-create-your-own-linux-distribution-with-yocto/big/task_list.png
[19]:https://www.howtoforge.com/images/how-to-create-your-own-linux-distribution-with-yocto/big/downloaded-all_packages_and_compiled.png
[20]:https://www.howtoforge.com/images/how-to-create-your-own-linux-distribution-with-yocto/big/new_linux_compiled_under_qemux86_64.png
[21]:https://www.howtoforge.com/images/how-to-create-your-own-linux-distribution-with-yocto/big/error_on_putty.png
[22]:https://www.howtoforge.com/images/how-to-create-your-own-linux-distribution-with-yocto/big/runqemu_command.png
[23]:https://www.howtoforge.com/images/how-to-create-your-own-linux-distribution-with-yocto/big/new_linux_inside_the_qemu_.png
[24]:https://www.howtoforge.com/images/how-to-create-your-own-linux-distribution-with-yocto/big/reference_distro.png
[25]:https://www.howtoforge.com/images/how-to-create-your-own-linux-distribution-with-yocto/big/inside_new_linux_distro_running_on_qemu_3.png