2019-07-10 10:45:06 +08:00
|
|
|
|
[#]: collector: (lujun9972)
|
|
|
|
|
|
[#]: translator: (robsean)
|
2019-07-11 00:11:15 +08:00
|
|
|
|
[#]: reviewer: (wxy)
|
2019-07-11 00:11:41 +08:00
|
|
|
|
[#]: publisher: (wxy)
|
|
|
|
|
|
[#]: url: (https://linux.cn/article-11083-1.html)
|
2019-07-10 10:45:06 +08:00
|
|
|
|
[#]: subject: (Debian 10 (Buster) Installation Steps with Screenshots)
|
|
|
|
|
|
[#]: via: (https://www.linuxtechi.com/debian-10-buster-installation-guide/)
|
|
|
|
|
|
[#]: author: (Pradeep Kumar https://www.linuxtechi.com/author/pradeep/)
|
|
|
|
|
|
|
2019-07-11 00:11:15 +08:00
|
|
|
|
图解 Debian 10(Buster)安装步骤
|
2019-07-10 10:45:06 +08:00
|
|
|
|
======
|
|
|
|
|
|
|
2019-07-11 00:11:15 +08:00
|
|
|
|

|
2019-07-10 10:45:06 +08:00
|
|
|
|
|
2019-07-11 00:11:15 +08:00
|
|
|
|
Debian 项目发布了它的最新稳定版 Debian 10,其代号是 “Buster”,这个发布版将获得 5 年的支持。Debian 10 可用于 32 位和 64 位系统。这个发布版带来很多新的特色,列出下面一些特色:
|
2019-07-10 10:45:06 +08:00
|
|
|
|
|
2019-07-11 00:11:15 +08:00
|
|
|
|
* 引入新的 Debian 10 的主题 “FuturePrototype”
|
|
|
|
|
|
* 新版本的电脑桌面环境 GNOME 3.30、Cinnamon 3.8、KDE Plasma 5.14、MATE 1.20、Xfce 4.12
|
|
|
|
|
|
* 长期支持版内核 4.19.0-4
|
|
|
|
|
|
* 新的 Python 3 (3.7.2)、Perl 5.28、PHP 7.3
|
|
|
|
|
|
* iptables 替换为 nftables
|
|
|
|
|
|
* 更新 LibreOffice 6.1、GIMP 2.10.8
|
|
|
|
|
|
* 更新 OpenJDK 11、MariaDB 10.3 和 Apache 2.4.38
|
|
|
|
|
|
* 更新 Chromium 73.0、Firefox 60.7
|
|
|
|
|
|
* 改进 UEFI 支持
|
2019-07-10 10:45:06 +08:00
|
|
|
|
|
2019-07-11 00:11:15 +08:00
|
|
|
|
在这篇文章中,我们将演示如何在你的笔记本电脑和台式电脑上安装 Debian 10 “Buster” 工作站。
|
2019-07-10 10:45:06 +08:00
|
|
|
|
|
2019-07-11 00:11:15 +08:00
|
|
|
|
Debian 10 建议系统要求:
|
2019-07-10 10:45:06 +08:00
|
|
|
|
|
|
|
|
|
|
* 2 GB 内存
|
|
|
|
|
|
* 2 GHz 双核处理器
|
|
|
|
|
|
* 10 GB 可用硬盘空间
|
2019-07-11 00:11:15 +08:00
|
|
|
|
* 可启动安装介质(USB / DVD)
|
|
|
|
|
|
* 网络连接(可选)
|
2019-07-10 10:45:06 +08:00
|
|
|
|
|
2019-07-11 00:11:15 +08:00
|
|
|
|
让我们跳转到 Debian 10 的安装步骤。
|
2019-07-10 10:45:06 +08:00
|
|
|
|
|
2019-07-11 00:11:15 +08:00
|
|
|
|
### 步骤:1)下载 Debian 10 ISO 文件
|
2019-07-10 10:45:06 +08:00
|
|
|
|
|
|
|
|
|
|
从它的官方入口网站,下载 Debian 10 ISO 文件,
|
|
|
|
|
|
|
2019-07-11 00:11:15 +08:00
|
|
|
|
- https://www.debian.org/releases/buster/debian-installer/
|
2019-07-10 10:45:06 +08:00
|
|
|
|
|
2019-07-11 00:11:15 +08:00
|
|
|
|
ISO 文件下载完成后刻录它到 USB 或 DVD,使其可用来启动。
|
2019-07-10 10:45:06 +08:00
|
|
|
|
|
2019-07-11 00:11:15 +08:00
|
|
|
|
### 步骤:2)使用安装可启动介质(USB / DVD)启动你的电脑系统
|
2019-07-10 10:45:06 +08:00
|
|
|
|
|
2019-07-11 00:11:15 +08:00
|
|
|
|
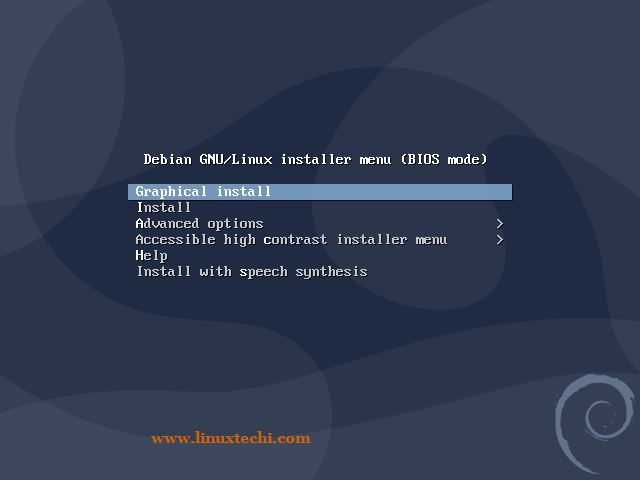
重启你将安装 Debian 10 的电脑,转到 BIOS 设置,并设置启动介质为 USB 或 DVD。 用可启动介质启动电脑后,那么我们将看到下面的屏幕。
|
2019-07-10 10:45:06 +08:00
|
|
|
|
|
2019-07-11 00:11:15 +08:00
|
|
|
|
|
2019-07-10 10:45:06 +08:00
|
|
|
|
|
2019-07-11 00:11:15 +08:00
|
|
|
|
选择第一个选项 “Graphical Install”。
|
2019-07-10 10:45:06 +08:00
|
|
|
|
|
2019-07-11 00:11:15 +08:00
|
|
|
|
### 步骤:3)选择你的首选语言、位置和键盘布局
|
2019-07-10 10:45:06 +08:00
|
|
|
|
|
2019-07-11 00:11:15 +08:00
|
|
|
|
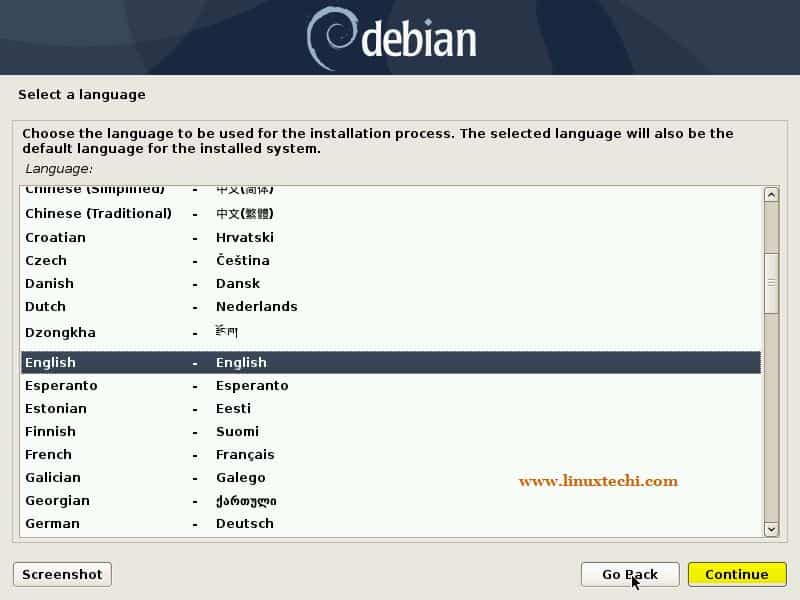
在这个步骤中,你将被要求选择你的首选语言。
|
2019-07-10 10:45:06 +08:00
|
|
|
|
|
2019-07-11 00:11:15 +08:00
|
|
|
|
|
2019-07-10 10:45:06 +08:00
|
|
|
|
|
2019-07-11 00:11:15 +08:00
|
|
|
|
点击 “Continue”。
|
2019-07-10 10:45:06 +08:00
|
|
|
|
|
|
|
|
|
|
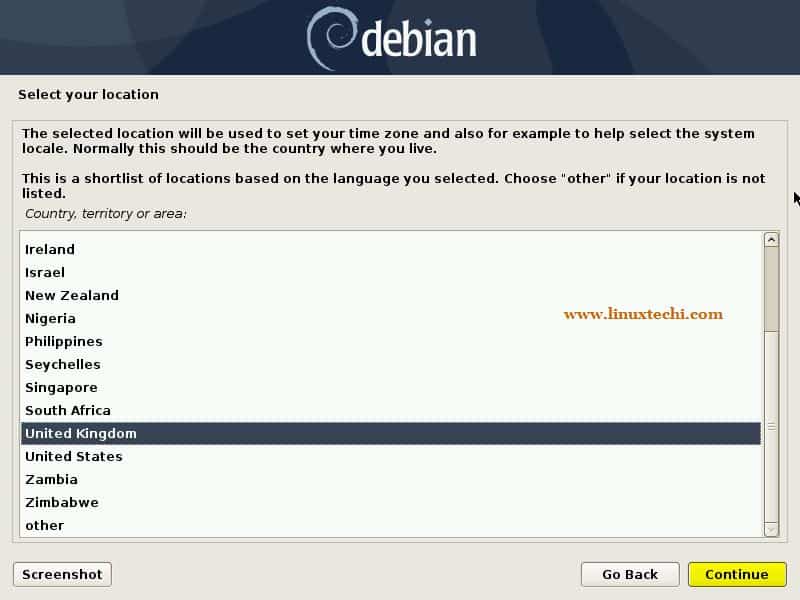
选择你的首选位置,电脑系统将依照位置自动设置时区。
|
|
|
|
|
|
|
2019-07-11 00:11:15 +08:00
|
|
|
|
|
2019-07-10 10:45:06 +08:00
|
|
|
|
|
2019-07-11 00:11:15 +08:00
|
|
|
|
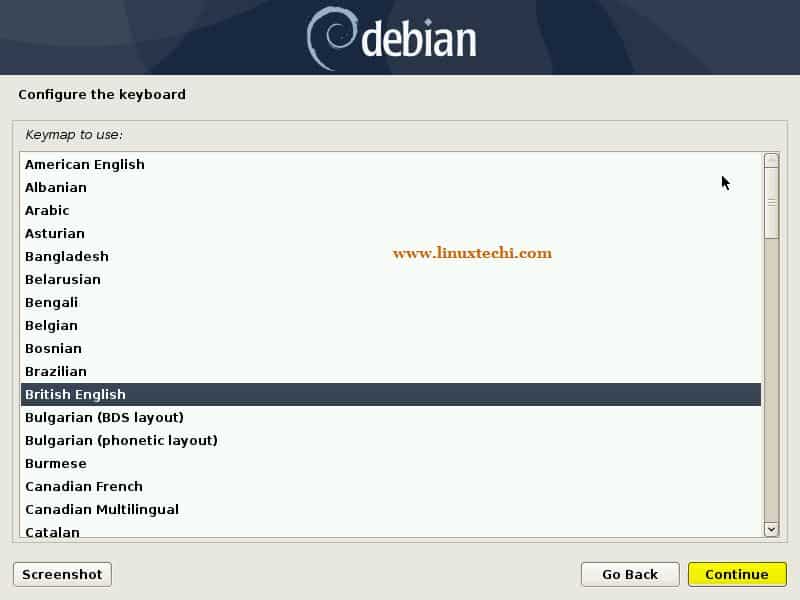
现在选择适合于你安装设备的键盘布局。
|
2019-07-10 10:45:06 +08:00
|
|
|
|
|
2019-07-11 00:11:15 +08:00
|
|
|
|
|
2019-07-10 10:45:06 +08:00
|
|
|
|
|
2019-07-11 00:11:15 +08:00
|
|
|
|
点击 “Continue” 以继续。
|
2019-07-10 10:45:06 +08:00
|
|
|
|
|
2019-07-11 00:11:15 +08:00
|
|
|
|
### 步骤:4)为 Debian 10 系统设置主机名称和域名
|
2019-07-10 10:45:06 +08:00
|
|
|
|
|
2019-07-11 00:11:15 +08:00
|
|
|
|
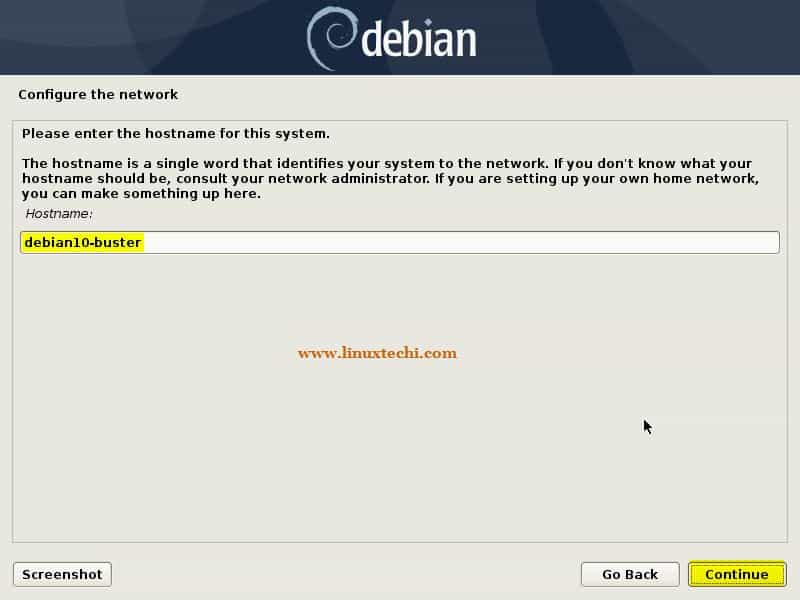
设置适合于你的环境的主机名,然后在 “Continue” 上单击,就我而言, 我指定主机名为 “debian10-buster”。
|
2019-07-10 10:45:06 +08:00
|
|
|
|
|
2019-07-11 00:11:15 +08:00
|
|
|
|
|
2019-07-10 10:45:06 +08:00
|
|
|
|
|
2019-07-11 00:11:15 +08:00
|
|
|
|
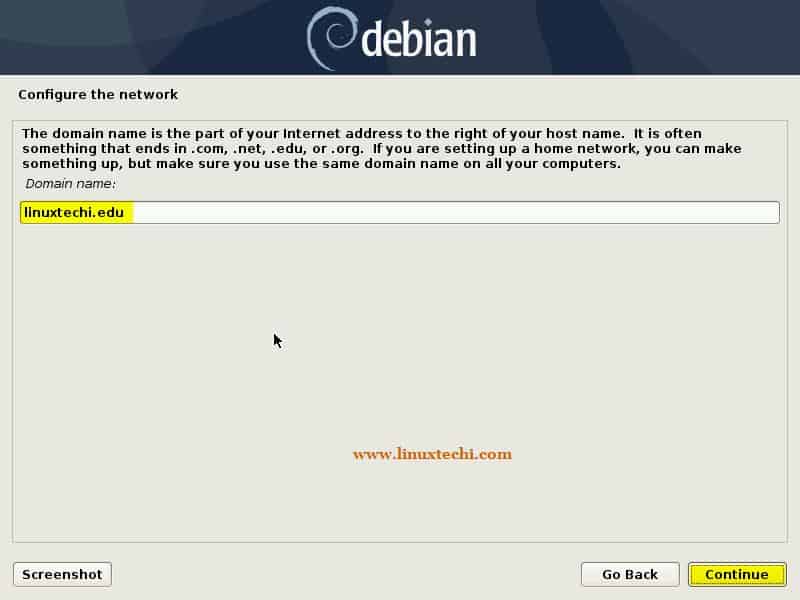
指定适合于环境的域名,并安装,然后在 “Continue” 上单击。
|
2019-07-10 10:45:06 +08:00
|
|
|
|
|
2019-07-11 00:11:15 +08:00
|
|
|
|
|
2019-07-10 10:45:06 +08:00
|
|
|
|
|
2019-07-11 00:11:15 +08:00
|
|
|
|
### 步骤:5)指定 root 用户的密码
|
2019-07-10 10:45:06 +08:00
|
|
|
|
|
2019-07-11 00:11:15 +08:00
|
|
|
|
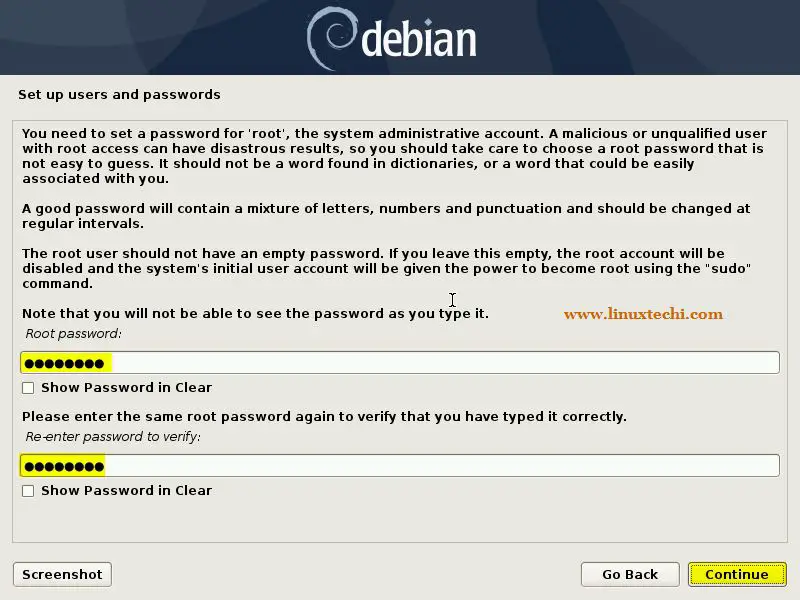
在下面的屏幕中指定 root 密码,然后在 “Continue” 上单击。
|
2019-07-10 10:45:06 +08:00
|
|
|
|
|
2019-07-11 00:11:15 +08:00
|
|
|
|
|
2019-07-10 10:45:06 +08:00
|
|
|
|
|
2019-07-11 00:11:15 +08:00
|
|
|
|
### 步骤:6)创建本地用户和它的密码
|
2019-07-10 10:45:06 +08:00
|
|
|
|
|
2019-07-11 00:11:15 +08:00
|
|
|
|
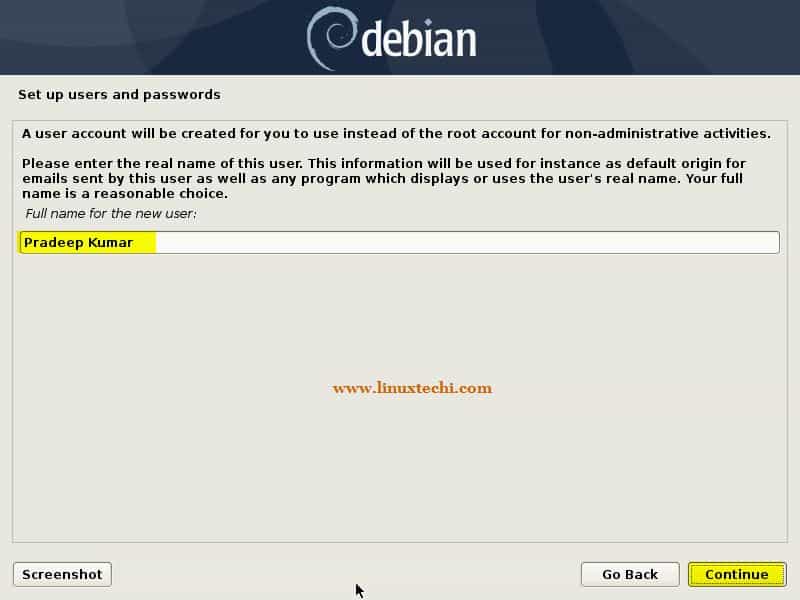
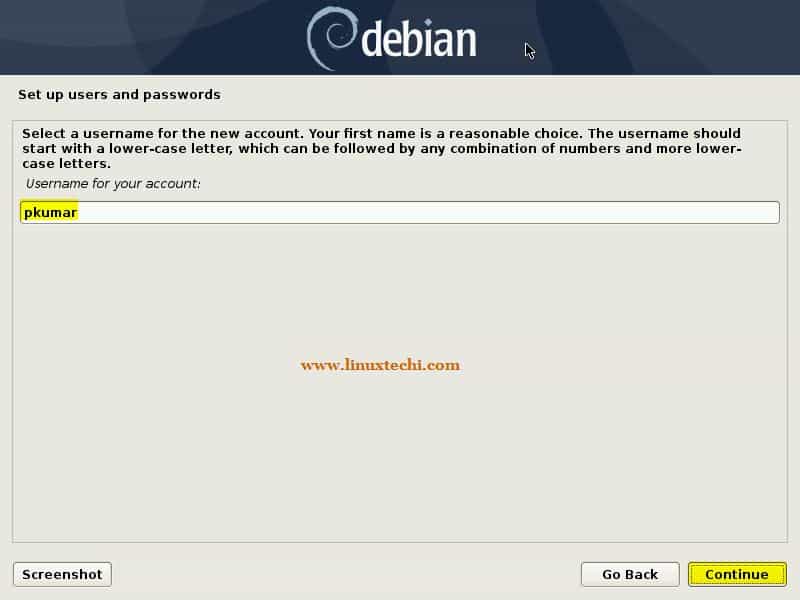
在这个步骤中,你将被提示指定本地用户具体信息,如完整的姓名、用户名和密码,
|
2019-07-10 10:45:06 +08:00
|
|
|
|
|
2019-07-11 00:11:15 +08:00
|
|
|
|
|
2019-07-10 10:45:06 +08:00
|
|
|
|
|
2019-07-11 00:11:15 +08:00
|
|
|
|
在 “Continue” 上单击。
|
2019-07-10 10:45:06 +08:00
|
|
|
|
|
2019-07-11 00:11:15 +08:00
|
|
|
|
|
2019-07-10 10:45:06 +08:00
|
|
|
|
|
2019-07-11 00:11:15 +08:00
|
|
|
|
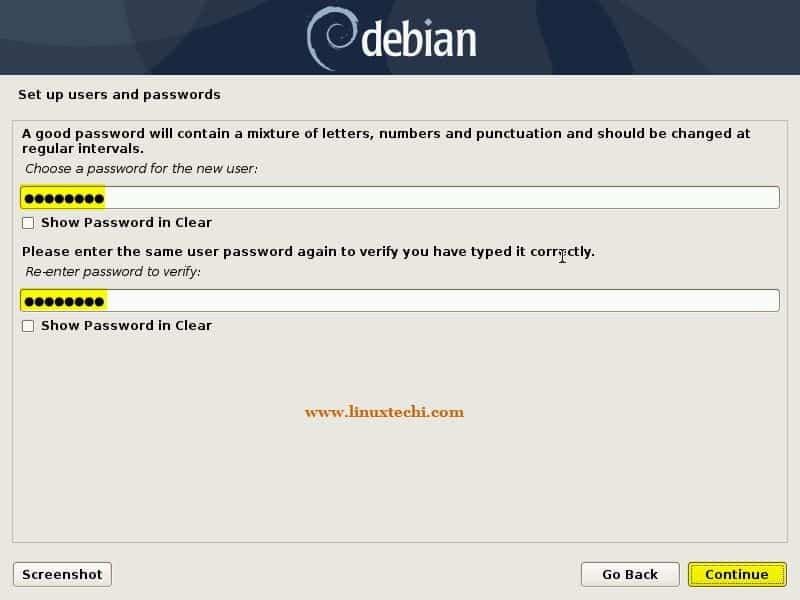
在 “Continue” 上单击,并在接下来的窗口中指定密码。
|
2019-07-10 10:45:06 +08:00
|
|
|
|
|
2019-07-11 00:11:15 +08:00
|
|
|
|
|
2019-07-10 10:45:06 +08:00
|
|
|
|
|
2019-07-11 00:11:15 +08:00
|
|
|
|
### 步骤:7)为 Debian 10 选择硬盘分区方案
|
2019-07-10 10:45:06 +08:00
|
|
|
|
|
|
|
|
|
|
在这个步骤中,为 Debian 10 选择硬盘分区方案,就我而言,我有 40 GB 硬盘可用于操作系统安装。分区方案有两种类型:
|
|
|
|
|
|
|
2019-07-11 00:11:15 +08:00
|
|
|
|
* 向导分区(安装器将自动创建需要的分区)
|
|
|
|
|
|
* 手动分区(正如名字所示,使用这种方式,我们可以手动创建分区方案)
|
2019-07-10 10:45:06 +08:00
|
|
|
|
|
2019-07-11 00:11:15 +08:00
|
|
|
|
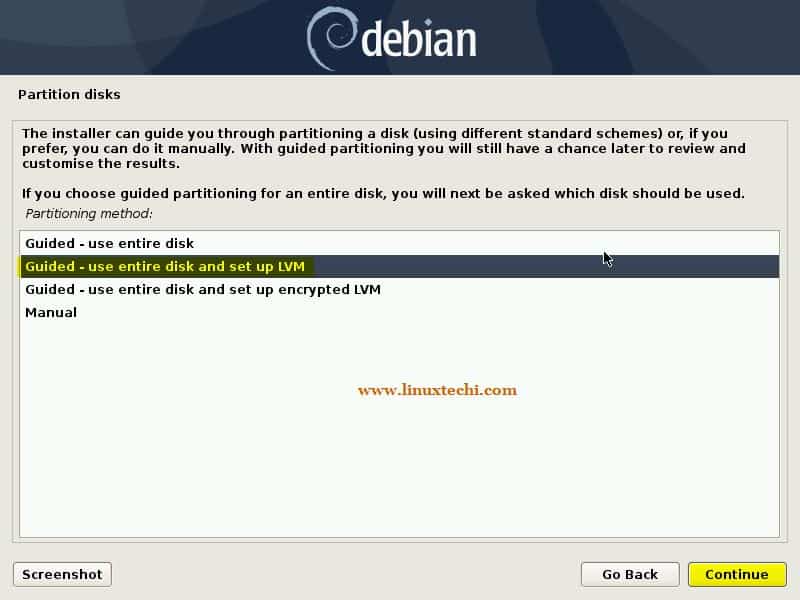
在这篇教程中,我们将在我 42 GB 硬盘上使用带有 LVM 的向导分区。
|
2019-07-10 10:45:06 +08:00
|
|
|
|
|
2019-07-11 00:11:15 +08:00
|
|
|
|
|
2019-07-10 10:45:06 +08:00
|
|
|
|
|
2019-07-11 00:11:15 +08:00
|
|
|
|
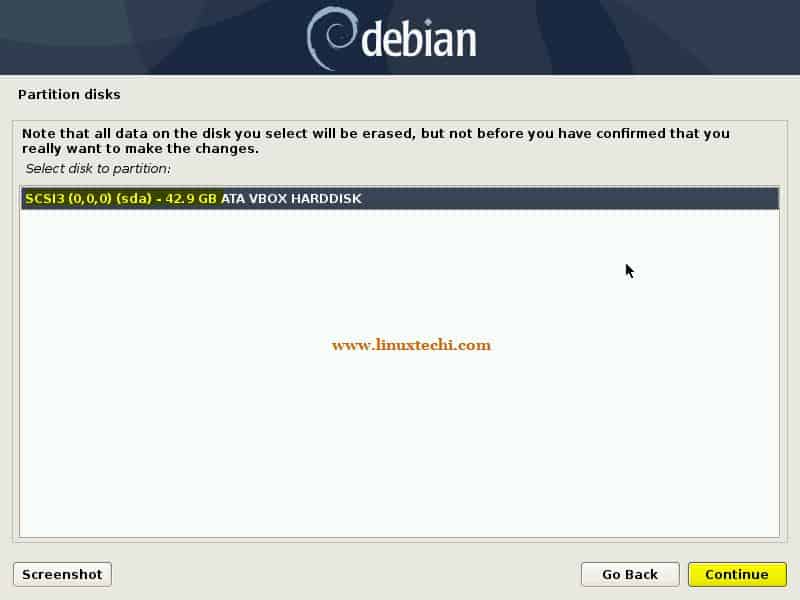
在 “Continue” 上单击来继续,
|
2019-07-10 10:45:06 +08:00
|
|
|
|
|
2019-07-11 00:11:15 +08:00
|
|
|
|
|
2019-07-10 10:45:06 +08:00
|
|
|
|
|
2019-07-11 00:11:15 +08:00
|
|
|
|
正如我们所视,我大约有 42 GB 硬盘空间,选择 “Continue”。
|
2019-07-10 10:45:06 +08:00
|
|
|
|
|
2019-07-11 00:11:15 +08:00
|
|
|
|
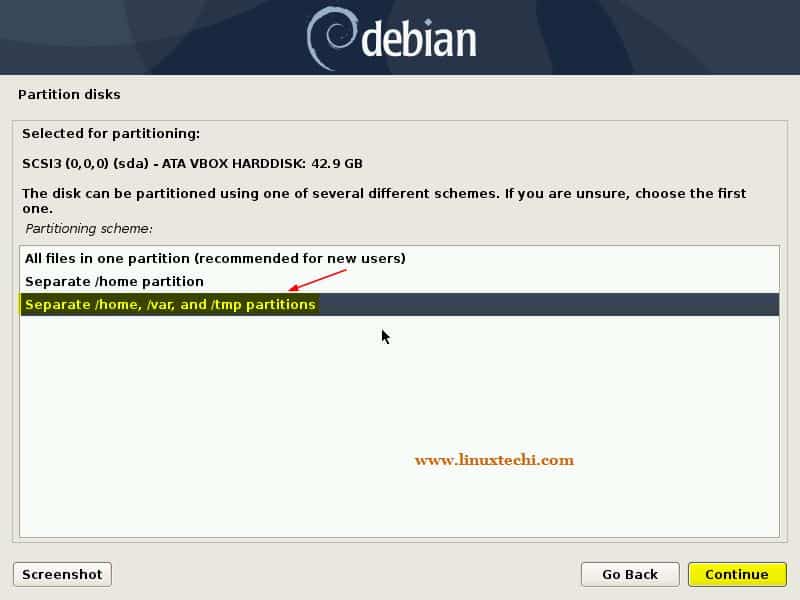
在接下来的屏幕中,你将被要求选择分区,如果是 Linux 新用户,那么选择第一个选项。假使你想要一个独立的 home 分区,那么选择第二种方案,否则选择第三种方案,它们将为 `/home`、`/var` 和 `/tmp` 创建独立的分区。
|
2019-07-10 10:45:06 +08:00
|
|
|
|
|
2019-07-11 00:11:15 +08:00
|
|
|
|
就我而言,我将通过选择第三种选项来为 `/home`、`/var` 和 `/tmp` 创建独立的分区。
|
2019-07-10 10:45:06 +08:00
|
|
|
|
|
2019-07-11 00:11:15 +08:00
|
|
|
|
|
2019-07-10 10:45:06 +08:00
|
|
|
|
|
2019-07-11 00:11:15 +08:00
|
|
|
|
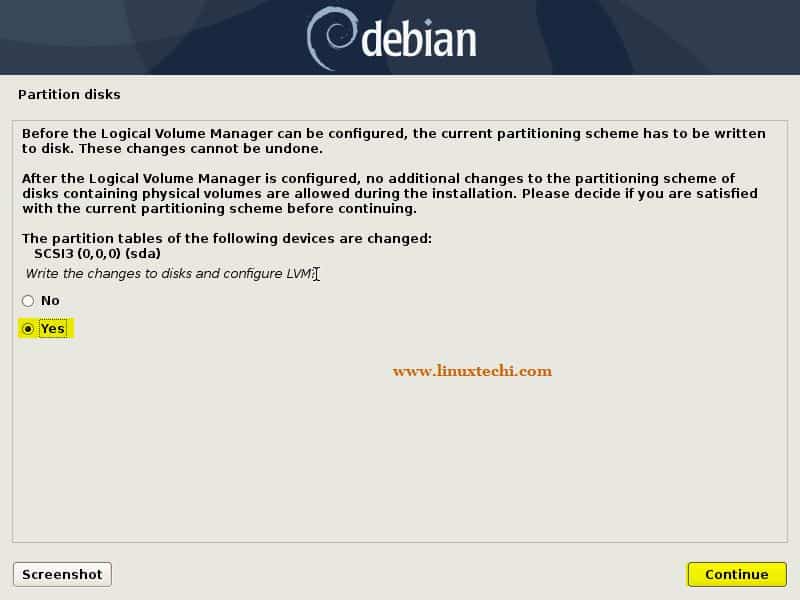
在接下来的屏幕中,选择 “yes” 来将更改写到磁盘中,配置 LVM ,然后在 “Continue” 上单击。
|
2019-07-10 10:45:06 +08:00
|
|
|
|
|
2019-07-11 00:11:15 +08:00
|
|
|
|
|
2019-07-10 10:45:06 +08:00
|
|
|
|
|
2019-07-11 00:11:15 +08:00
|
|
|
|
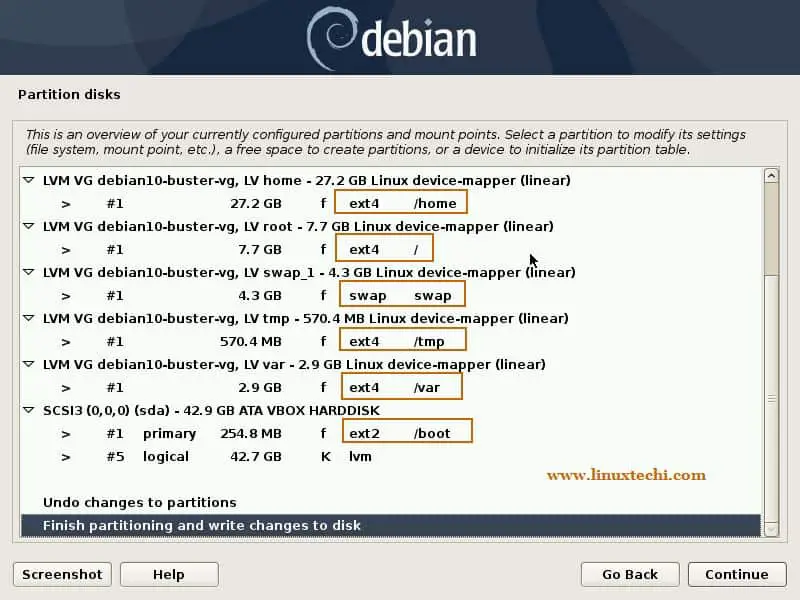
在接下来的屏幕中,将显示分区表,验证分区大小、文件系统类型和挂载点。
|
2019-07-10 10:45:06 +08:00
|
|
|
|
|
2019-07-11 00:11:15 +08:00
|
|
|
|
|
2019-07-10 10:45:06 +08:00
|
|
|
|
|
2019-07-11 00:11:15 +08:00
|
|
|
|
在 “Continue” 上单击来继续,
|
2019-07-10 10:45:06 +08:00
|
|
|
|
|
|
|
|
|
|
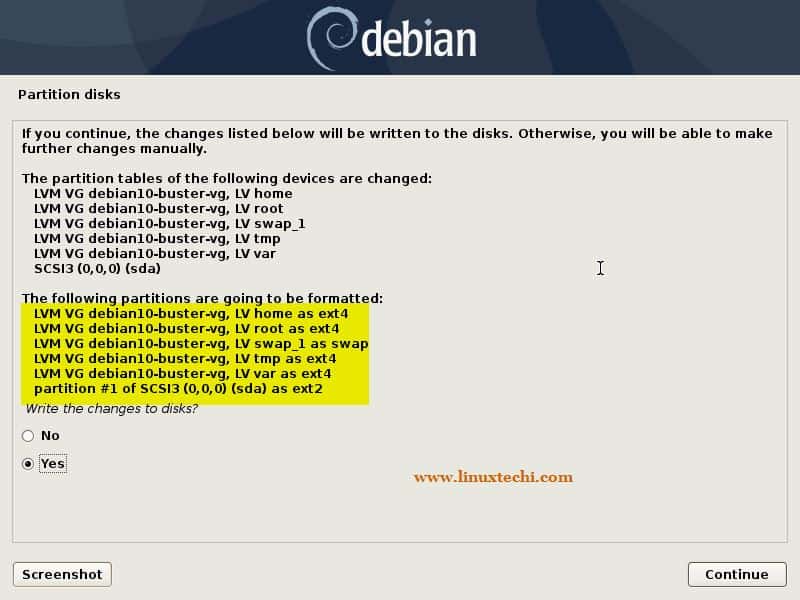
在接下来的屏幕中,选择 “yes” 来写更改到磁盘中,
|
|
|
|
|
|
|
2019-07-11 00:11:15 +08:00
|
|
|
|
|
2019-07-10 10:45:06 +08:00
|
|
|
|
|
2019-07-11 00:11:15 +08:00
|
|
|
|
在 “Continue” 上单击来继续安装,
|
2019-07-10 10:45:06 +08:00
|
|
|
|
|
2019-07-11 00:11:15 +08:00
|
|
|
|
### 步骤:7)Debian 10 安装开始
|
2019-07-10 10:45:06 +08:00
|
|
|
|
|
|
|
|
|
|
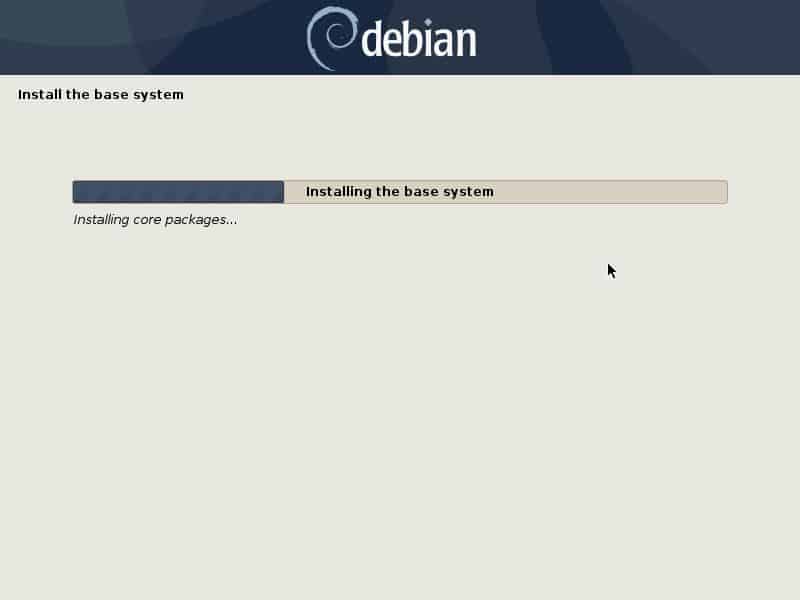
在这一步骤中,Debian 10 的安装已经开始,并正在进行中,
|
|
|
|
|
|
|
2019-07-11 00:11:15 +08:00
|
|
|
|
|
|
|
|
|
|
|
|
|
|
|
|
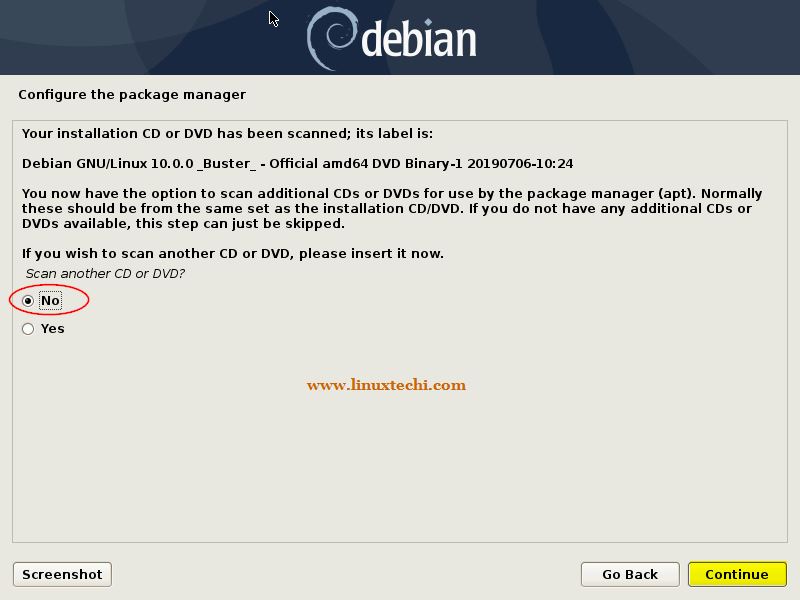
在安装期间,安装器将提示你扫描 CD/DVD 以配置软件包管理器,选择 “No” ,然后在 “Continue” 上单击。
|
2019-07-10 10:45:06 +08:00
|
|
|
|
|
2019-07-11 00:11:15 +08:00
|
|
|
|
|
2019-07-10 10:45:06 +08:00
|
|
|
|
|
2019-07-11 00:11:15 +08:00
|
|
|
|
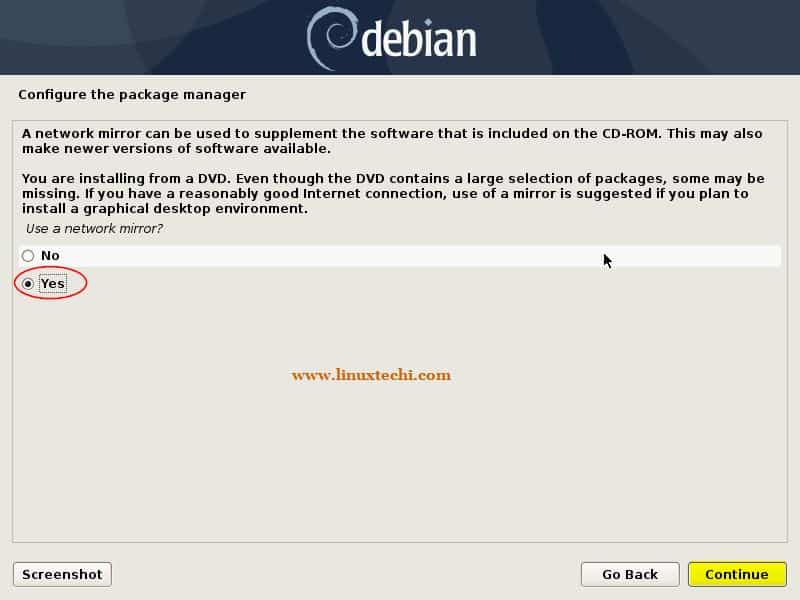
在接下来的屏幕中,如果你想配置基于网络的软件包管理器选择 “yes” ,但是为了使这个方式工作,要确保你的系统连接到了网络,否则选择 “No”。
|
2019-07-10 10:45:06 +08:00
|
|
|
|
|
2019-07-11 00:11:15 +08:00
|
|
|
|
|
2019-07-10 10:45:06 +08:00
|
|
|
|
|
2019-07-11 00:11:15 +08:00
|
|
|
|
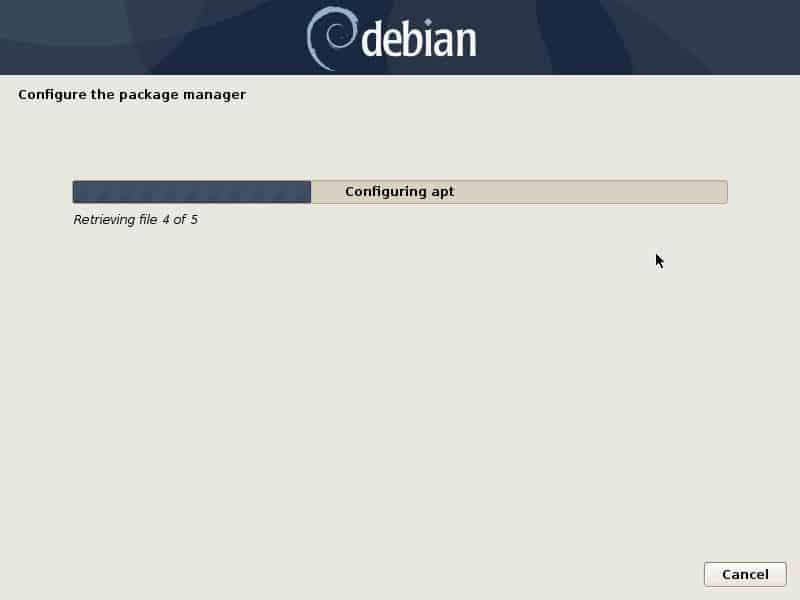
在 “Continue” 上单击来配置基于你本地的软件包管理器,在接下来的几个屏幕中,你将被提示选择本地和 Debian 软件包存储库 URL ,然后你将获得下面的屏幕。
|
2019-07-10 10:45:06 +08:00
|
|
|
|
|
2019-07-11 00:11:15 +08:00
|
|
|
|
|
2019-07-10 10:45:06 +08:00
|
|
|
|
|
2019-07-11 00:11:15 +08:00
|
|
|
|
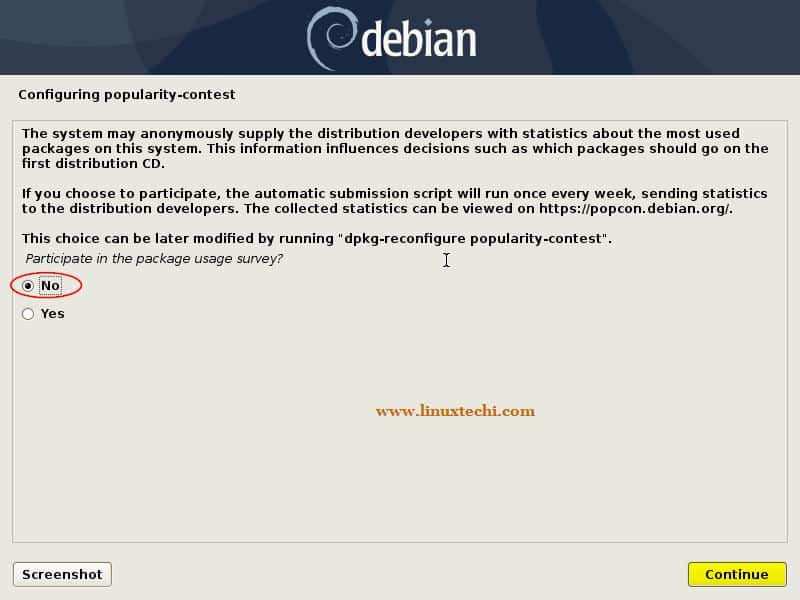
选择 “No” 来跳过软件包审查步骤,然后在 “Continue” 上单击。
|
2019-07-10 10:45:06 +08:00
|
|
|
|
|
2019-07-11 00:11:15 +08:00
|
|
|
|
|
2019-07-10 10:45:06 +08:00
|
|
|
|
|
2019-07-11 00:11:15 +08:00
|
|
|
|
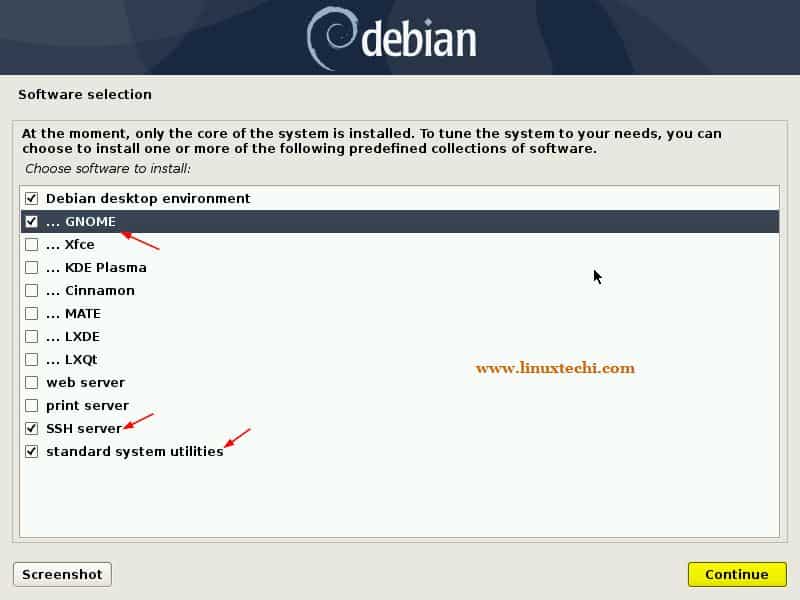
在接下来的窗口中,你将被提示选择电脑桌面环境和其它软件包,就我而言,我选择 “Gnome Desktop” ,“SSH Server” 和 “Standard System utilities”。
|
2019-07-10 10:45:06 +08:00
|
|
|
|
|
2019-07-11 00:11:15 +08:00
|
|
|
|
|
2019-07-10 10:45:06 +08:00
|
|
|
|
|
2019-07-11 00:11:15 +08:00
|
|
|
|
在 “Continue” 上单击来继续安装,
|
2019-07-10 10:45:06 +08:00
|
|
|
|
|
2019-07-11 00:11:15 +08:00
|
|
|
|
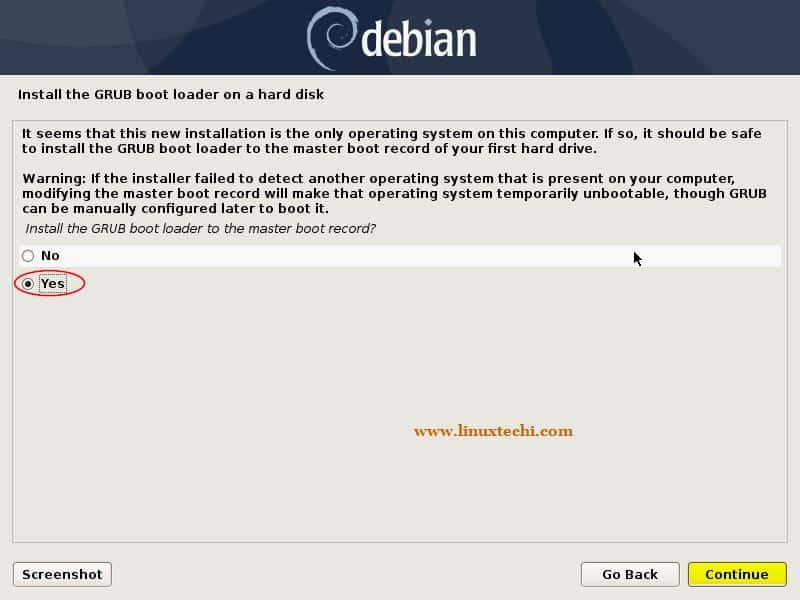
选择选项 “yes” 来安装 Grub 引导加载程序。
|
2019-07-10 10:45:06 +08:00
|
|
|
|
|
2019-07-11 00:11:15 +08:00
|
|
|
|
|
2019-07-10 10:45:06 +08:00
|
|
|
|
|
2019-07-11 00:11:15 +08:00
|
|
|
|
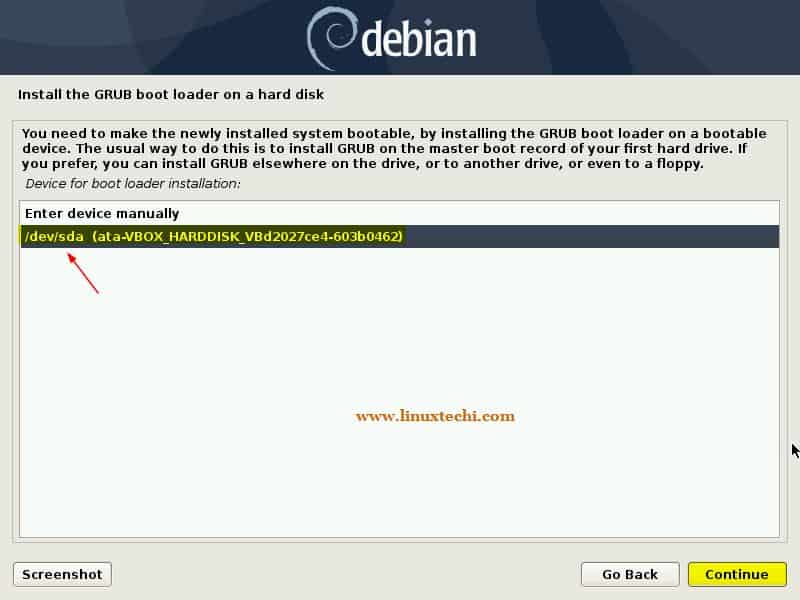
在 “Continue” 上单击来继续,然后在接下来的窗口中选择将安装引导加载程序的磁盘(`/dev/sda`)。
|
2019-07-10 10:45:06 +08:00
|
|
|
|
|
2019-07-11 00:11:15 +08:00
|
|
|
|
|
2019-07-10 10:45:06 +08:00
|
|
|
|
|
2019-07-11 00:11:15 +08:00
|
|
|
|
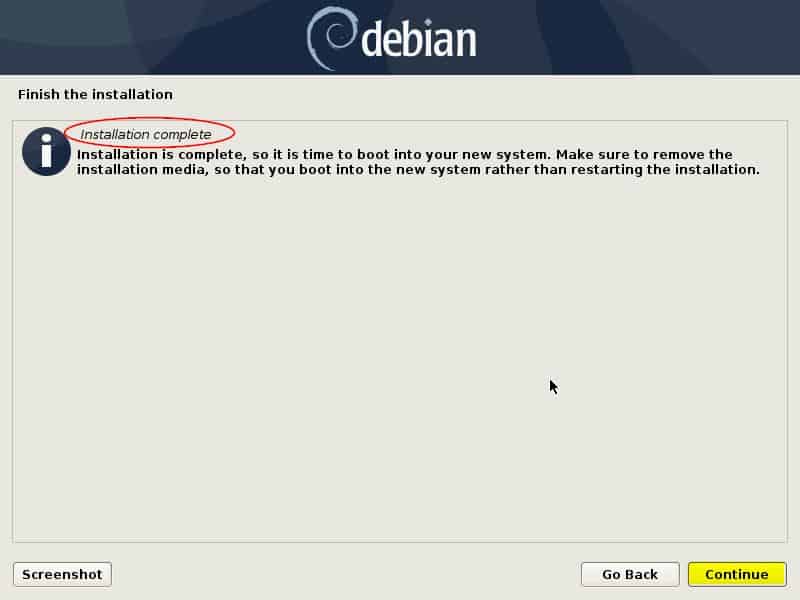
在 “Continue” 上单击来继续安装,一旦安装完成,安装器将提示我们来重启系统,
|
2019-07-10 10:45:06 +08:00
|
|
|
|
|
2019-07-11 00:11:15 +08:00
|
|
|
|
|
2019-07-10 10:45:06 +08:00
|
|
|
|
|
2019-07-11 00:11:15 +08:00
|
|
|
|
在 “Continue” 上单击来重启你的系统,不要忘记在 BIOS 设置中更改启动介质,以便系统从我们已经安装 Debian 10 操作系统的硬盘启动。
|
2019-07-10 10:45:06 +08:00
|
|
|
|
|
2019-07-11 00:11:15 +08:00
|
|
|
|
### 步骤:8)启动你新安装的 Debian 10 系统
|
2019-07-10 10:45:06 +08:00
|
|
|
|
|
2019-07-11 00:11:15 +08:00
|
|
|
|
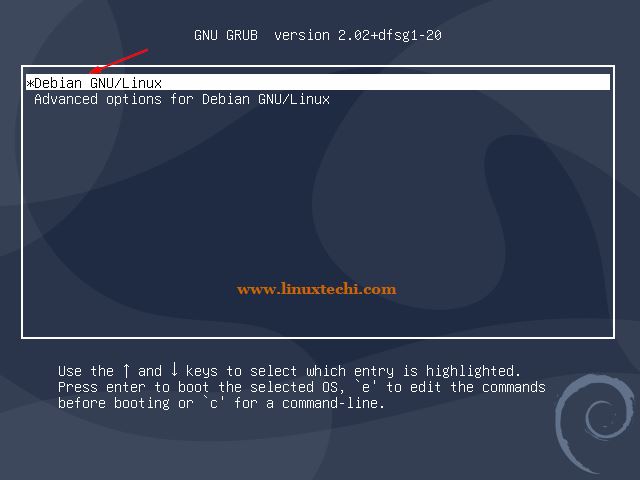
在成功安装后,一旦我们重启系统,我们将获取下面的引导加载程序屏幕。
|
2019-07-10 10:45:06 +08:00
|
|
|
|
|
2019-07-11 00:11:15 +08:00
|
|
|
|
|
2019-07-10 10:45:06 +08:00
|
|
|
|
|
2019-07-11 00:11:15 +08:00
|
|
|
|
选择第一个选项 “Debian GNU/Linux” 并敲击回车键。
|
2019-07-10 10:45:06 +08:00
|
|
|
|
|
2019-07-11 00:11:15 +08:00
|
|
|
|
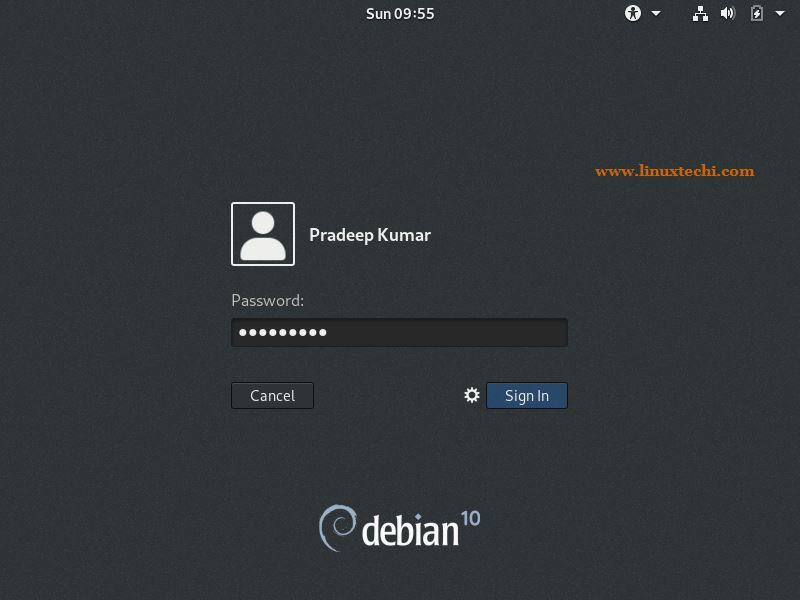
一旦系统启动,使用我在安装期间创建的本地用户和它的密码。
|
2019-07-10 10:45:06 +08:00
|
|
|
|
|
2019-07-11 00:11:15 +08:00
|
|
|
|
|
2019-07-10 10:45:06 +08:00
|
|
|
|
|
2019-07-11 00:11:15 +08:00
|
|
|
|
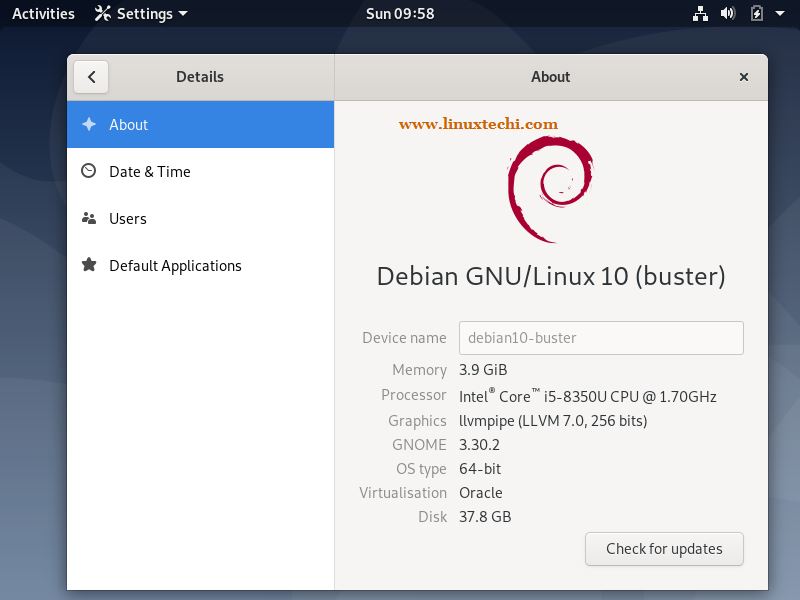
在成功登录后,将看到如下电脑桌面屏幕,
|
2019-07-10 10:45:06 +08:00
|
|
|
|
|
2019-07-11 00:11:15 +08:00
|
|
|
|
|
2019-07-10 10:45:06 +08:00
|
|
|
|
|
2019-07-11 00:11:15 +08:00
|
|
|
|
这证实 Debian 10 已经成功安装,这就是本文的全部,探索这个令人激动的 Linux 发行版吧,玩得开心 😊
|
2019-07-10 10:45:06 +08:00
|
|
|
|
|
|
|
|
|
|
--------------------------------------------------------------------------------
|
|
|
|
|
|
|
|
|
|
|
|
via: https://www.linuxtechi.com/debian-10-buster-installation-guide/
|
|
|
|
|
|
|
|
|
|
|
|
作者:[Pradeep Kumar][a]
|
|
|
|
|
|
选题:[lujun9972][b]
|
|
|
|
|
|
译者:[robsean](https://github.com/robsean)
|
2019-07-11 00:11:15 +08:00
|
|
|
|
校对:[wxy](https://github.com/wxy)
|
2019-07-10 10:45:06 +08:00
|
|
|
|
|
|
|
|
|
|
本文由 [LCTT](https://github.com/LCTT/TranslateProject) 原创编译,[Linux中国](https://linux.cn/) 荣誉推出
|
|
|
|
|
|
|
|
|
|
|
|
[a]: https://www.linuxtechi.com/author/pradeep/
|
|
|
|
|
|
[b]: https://github.com/lujun9972
|