mirror of
https://github.com/LCTT/TranslateProject.git
synced 2025-01-22 23:00:57 +08:00
107 lines
7.7 KiB
Markdown
107 lines
7.7 KiB
Markdown
|
|
Container technologies in Fedora: systemd-nspawn
|
|||
|
|
===
|
|||
|
|
|
|||
|
|
Welcome to the “Container technologies in Fedora” series! This is the first article in a series of articles that will explain how you can use the various container technologies available in Fedora. This first article will deal with `systemd-nspawn`.
|
|||
|
|
|
|||
|
|
### What is a container?
|
|||
|
|
|
|||
|
|
A container is a user-space instance which can be used to run a program or an operating system in isolation from the system hosting the container (called the host system). The idea is very similar to a `chroot` or a [virtual machine][1]. The processes running in a container are managed by the same kernel as the host operating system, but they are isolated from the host file system, and from the other processes.
|
|||
|
|
|
|||
|
|
|
|||
|
|
### What is systemd-nspawn?
|
|||
|
|
|
|||
|
|
The systemd project considers container technologies as something that should fundamentally be part of the desktop and that should integrate with the rest of the user’s systems. To this end, systemd provides `systemd-nspawn`, a tool which is able to create containers using various Linux technologies. It also provides some container management tools.
|
|||
|
|
|
|||
|
|
In many ways, `systemd-nspawn` is similar to `chroot`, but is much more powerful. It virtualizes the file system, process tree, and inter-process communication of the guest system. Much of its appeal lies in the fact that it provides a number of tools, such as `machinectl`, for managing containers. Containers run by `systemd-nspawn` will integrate with the systemd components running on the host system. As an example, journal entries can be logged from a container in the host system’s journal.
|
|||
|
|
|
|||
|
|
In Fedora 24, `systemd-nspawn` has been split out from the systemd package, so you’ll need to install the `systemd-container` package. As usual, you can do that with a `dnf install systemd-container`.
|
|||
|
|
|
|||
|
|
### Creating the container
|
|||
|
|
|
|||
|
|
Creating a container with `systemd-nspawn` is easy. Let’s say you have an application made for Debian, and it doesn’t run well anywhere else. That’s not a problem, we can make a container! To set up a container with the latest version of Debian (at this point in time, Jessie), you need to pick a directory to set up your system in. I’ll be using `~/DebianJessie` for now.
|
|||
|
|
|
|||
|
|
Once the directory has been created, you need to run `debootstrap`, which you can install from the Fedora repositories. For Debian Jessie, you run the following command to initialize a Debian file system.
|
|||
|
|
|
|||
|
|
```
|
|||
|
|
$ debootstrap --arch=amd64 stable ~/DebianJessie
|
|||
|
|
```
|
|||
|
|
|
|||
|
|
This assumes your architecture is x86_64. If it isn’t, you must change `amd64` to the name of your architecture. You can find your machine’s architecture with `uname -m`.
|
|||
|
|
|
|||
|
|
Once your root directory is set up, you will start your container with the following command.
|
|||
|
|
|
|||
|
|
```
|
|||
|
|
$ systemd-nspawn -bD ~/DebianJessie
|
|||
|
|
```
|
|||
|
|
|
|||
|
|
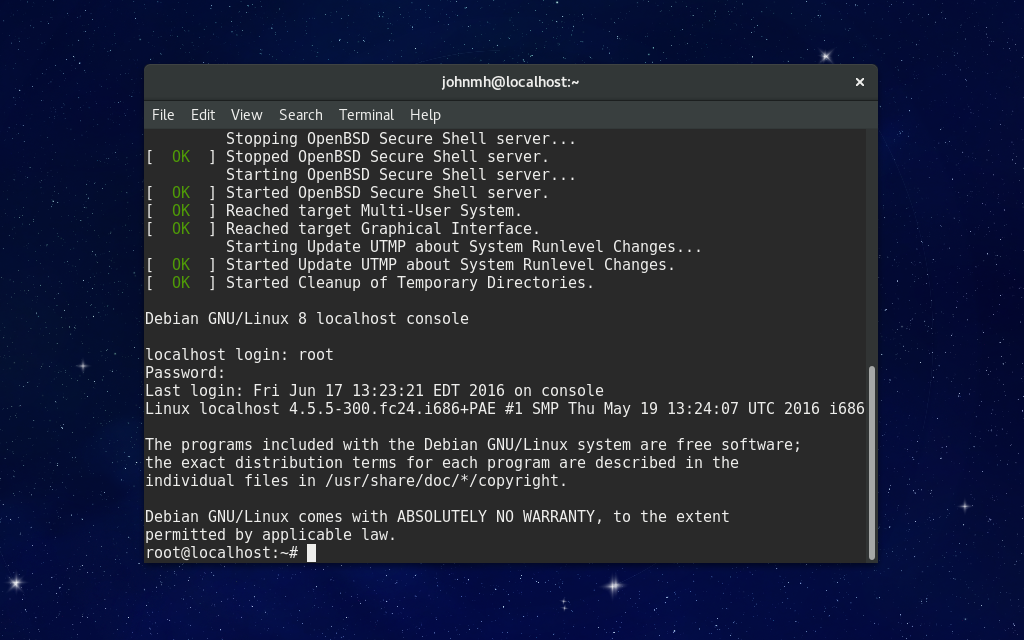
You’ll be up and running within seconds. You’ll notice something as soon as you try to log in: you can’t use any accounts on your system. This is because systemd-nspawn virtualizes users. The fix is simple: remove -b from the previous command. You’ll boot directly to the root shell in the container. From there, you can just use passwd to set a password for root, or you can use adduser to add a new user. As soon as you’re done with that, go ahead and put the -b flag back. You’ll boot to the familiar login console and you log in with the credentials you set.
|
|||
|
|
|
|||
|
|
All of this applies for any distribution you would want to run in the container, but you need to create the system using the correct package manager. For Fedora, you would use DNF instead of debootstrap. To set up a minimal Fedora system, you can run the following command, replacing the absolute path with wherever you want the container to be.
|
|||
|
|
|
|||
|
|
```
|
|||
|
|
$ sudo dnf --releasever=24 --installroot=/absolute/path/ install systemd passwd dnf fedora-release
|
|||
|
|
```
|
|||
|
|
|
|||
|
|

|
|||
|
|
|
|||
|
|
### Setting up the network
|
|||
|
|
|
|||
|
|
You’ll notice an issue if you attempt to start a service that binds to a port currently in use on your host system. Your container is using the same network interface. Luckily, `systemd-nspawn` provides several ways to achieve separate networking from the host machine.
|
|||
|
|
|
|||
|
|
#### Local networking
|
|||
|
|
|
|||
|
|
The first method uses the `--private-network` flag, which only creates a loopback device by default. This is ideal for environments where you don’t need networking, such as build systems and other continuous integration systems.
|
|||
|
|
|
|||
|
|
#### Multiple networking interfaces
|
|||
|
|
|
|||
|
|
If you have multiple network devices, you can give one to the container with the `--network-interface` flag. To give `eno1` to my container, I would add the flag `--network-interface=eno1`. While an interface is assigned to a container, the host can’t use it at the same time. When the container is completely shut down, it will be available to the host again.
|
|||
|
|
|
|||
|
|
#### Sharing network interfaces
|
|||
|
|
|
|||
|
|
For those of us who don’t have spare network devices, there are other options for providing access to the container. One of those is the `--port` flag. This forwards a port on the container to the host. The format is `protocol:host:container`, where protocol is either `tcp` or `udp`, `host` is a valid port number on the host, and `container` is a valid port on the container. You can omit the protocol and specify only `host:container`. I often use something similar to `--port=2222:22`.
|
|||
|
|
|
|||
|
|
You can enable complete, host-only networking with the `--network-veth` flag, which creates a virtual Ethernet interface between the host and the container. You can also bridge two connections with `--network-bridge`.
|
|||
|
|
|
|||
|
|
### Using systemd components
|
|||
|
|
|
|||
|
|
If the system in your container has D-Bus, you can use systemd’s provided utilities to control and monitor your container. Debian doesn’t include dbus in the base install. If you want to use it with Debian Jessie, you’ll want to run `apt install dbus`.
|
|||
|
|
|
|||
|
|
#### machinectl
|
|||
|
|
|
|||
|
|
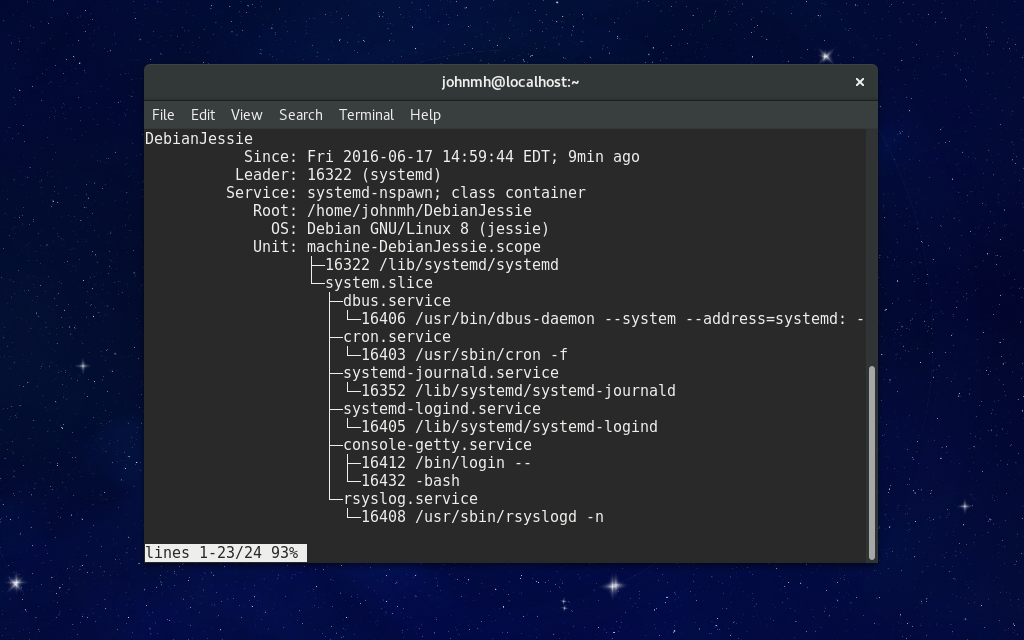
To easily manage containers, systemd provides the machinectl utility. Using machinectl, you can log in to a container with machinectl login name, check the status with machinectl status name, reboot with machinectl reboot name, or power it off with machinectl poweroff name.
|
|||
|
|
|
|||
|
|
### Other systemd commands
|
|||
|
|
|
|||
|
|
Most systemd commands, such as journalctl, systemd-analyze, and systemctl, support containers with the `--machine` option. For example, if you want to see the journals of a container named “foobar”, you can use journalctl `--machine=foobar`. You can also see the status of a service running in this container with `systemctl --machine=foobar` status service.
|
|||
|
|
|
|||
|
|

|
|||
|
|
|
|||
|
|
### Working with SELinux
|
|||
|
|
|
|||
|
|
If you’re running with SELinux enforcing (the default in Fedora), you’ll need to set the SELinux context for your container. To do that, you need to run the following two commands on the host system.
|
|||
|
|
|
|||
|
|
```
|
|||
|
|
$ semanage fcontext -a -t svirt_sandbox_file_t "/path/to/container(/.*)?"
|
|||
|
|
$ restorecon -R /path/to/container/
|
|||
|
|
```
|
|||
|
|
|
|||
|
|
Make sure you replace “/path/to/container” with the path to your container. For my container, “DebianJessie”, I would run the following:
|
|||
|
|
|
|||
|
|
```
|
|||
|
|
$ semanage fcontext -a -t svirt_sandbox_file_t "/home/johnmh/DebianJessie(/.*)?"
|
|||
|
|
$ restorecon -R /home/johnmh/DebianJessie/
|
|||
|
|
```
|
|||
|
|
|
|||
|
|
--------------------------------------------------------------------------------
|
|||
|
|
|
|||
|
|
via: http://linoxide.com/linux-how-to/set-nginx-reverse-proxy-centos-7-cpanel/
|
|||
|
|
|
|||
|
|
作者:[John M. Harris, Jr.][a]
|
|||
|
|
译者:[译者ID](https://github.com/译者ID)
|
|||
|
|
校对:[校对者ID](https://github.com/校对者ID)
|
|||
|
|
|
|||
|
|
本文由 [LCTT](https://github.com/LCTT/TranslateProject) 原创编译,[Linux中国](https://linux.cn/) 荣誉推出
|
|||
|
|
|
|||
|
|
[a]: http://linoxide.com/linux-how-to/set-nginx-reverse-proxy-centos-7-cpanel/
|
|||
|
|
[1]: https://en.wikipedia.org/wiki/Virtual_machine
|