mirror of
https://github.com/LCTT/TranslateProject.git
synced 2025-02-28 01:01:09 +08:00
216 lines
9.1 KiB
Markdown
216 lines
9.1 KiB
Markdown
|
|
安装完最小化 RHEL/CentOS 7 后需要做的 30 件事情--1
|
|||
|
|
================================================================================
|
|||
|
|
CentOS 是一个工业标准的 Linux 发行版,是红帽企业版 Linux 的衍生版本。你安装完后马上就可以使用,但是为了更好地使用你的系统,你需要进行一些升级、软件包安装、配置特定服务和应用程序等操作。
|
|||
|
|
|
|||
|
|
这篇文章介绍了 “安装完 RHEL/CentOS 7 后需要做的 30 件事情”。阅读帖子的时候请牢记已经完成了 RHEL/CentOS 最小化安装,这是首选的企业和生产环境,如果还没有,你可以按照下面的指南,它会告诉你两者的最小化安装方法。
|
|||
|
|
|
|||
|
|
- [最小化安装 CentOS 7][1]
|
|||
|
|
- [最小化安装 RHEL 7][2]
|
|||
|
|
|
|||
|
|
下面是一些重要的事情列表,基于工业标准需求我们都会进行介绍。我们希望这些东西在你配置服务器的时候能有所帮助。
|
|||
|
|
|
|||
|
|
1. 注册并启用红帽订阅
|
|||
|
|
2. 使用静态 IP 地址配置网络
|
|||
|
|
3. 设置服务器的主机名称
|
|||
|
|
4. 更新或升级最小化安装的 CentOS
|
|||
|
|
5. 安装命令行 Web 浏览器
|
|||
|
|
6. 安装 Apache HTTP 服务器
|
|||
|
|
7. 安装 PHP
|
|||
|
|
8. 安装 MariaDB 数据库
|
|||
|
|
9. 安装并配置 SSH 服务器
|
|||
|
|
10. 安装 GCC (GNU 编译器集)
|
|||
|
|
11. 安装 Java
|
|||
|
|
12. 安装 Apache Tomcat
|
|||
|
|
13. 安装 Nmap 检查开放端口
|
|||
|
|
14. 配置防火墙
|
|||
|
|
15. 安装 Wget
|
|||
|
|
16. 安装 Telnet
|
|||
|
|
17. 安装 Webmin
|
|||
|
|
18. 启用第三方库
|
|||
|
|
19. 安装 7-zip 工具
|
|||
|
|
20. 安装 NTFS-3G 驱动
|
|||
|
|
21. 安装 Vsftpd FTP 服务器
|
|||
|
|
22. 安装和配置 sudo
|
|||
|
|
23. 安装并启用 SELinux
|
|||
|
|
24. 安装 Rootkit Hunter
|
|||
|
|
25. 安装 Linux Malware Detect (LMD)
|
|||
|
|
26. 用 Speedtest-cli 测试服务器带宽
|
|||
|
|
27. 配置 Cron 作业
|
|||
|
|
28. 安装 Owncloud
|
|||
|
|
29. 启用 VirtualBox 虚拟化
|
|||
|
|
30. 用密码保护 GRUB
|
|||
|
|
|
|||
|
|
### 1. 注册并启用红帽订阅 ###
|
|||
|
|
|
|||
|
|
RHEL 7 最小化安装完成后,是时候注册并启用系统红帽订阅库,以及执行一个完整的系统更新。这只当你有一个可用的红帽订阅时才能有效。你要注册才能启用官方红帽系统库并时不时进行操作系统更新。
|
|||
|
|
|
|||
|
|
在下面的指南中我们已经包括了一个如何注册并激活红帽订阅的详细说明。
|
|||
|
|
|
|||
|
|
- [在 RHEL 7 中注册并启用红帽订阅][3]
|
|||
|
|
|
|||
|
|
**注意**: 这一步仅适用于有一个有效订阅的红帽企业版 Linux. 如果你用的是 CentOS 服务器,请查看后面的章节。
|
|||
|
|
|
|||
|
|
### 2. 使用静态 IP 地址配置网络 ###
|
|||
|
|
|
|||
|
|
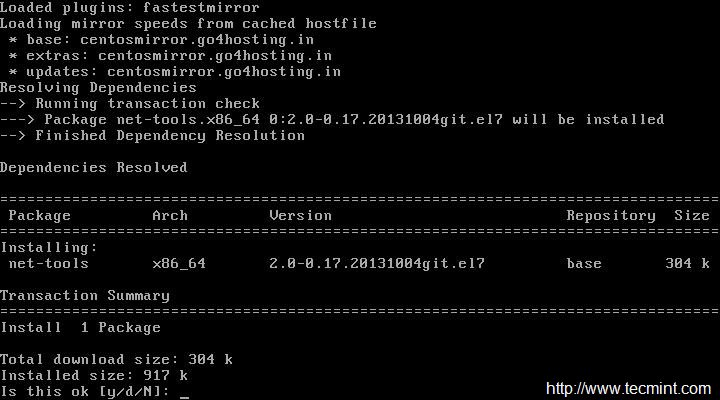
你第一件要做的事情就是为你的 CentOS 服务器配置静态 IP 地址,路由以及 DNS。我们会使用 ip 命令代替 ifconfig 命令。当然,ifconfig 命令对于大部分 Linux 发行版来说还是可用的,还能从默认库安装。
|
|||
|
|
|
|||
|
|
# yum install net-tools [提供 ifconfig 工具]
|
|||
|
|
|
|||
|
|
|
|||
|
|
|
|||
|
|
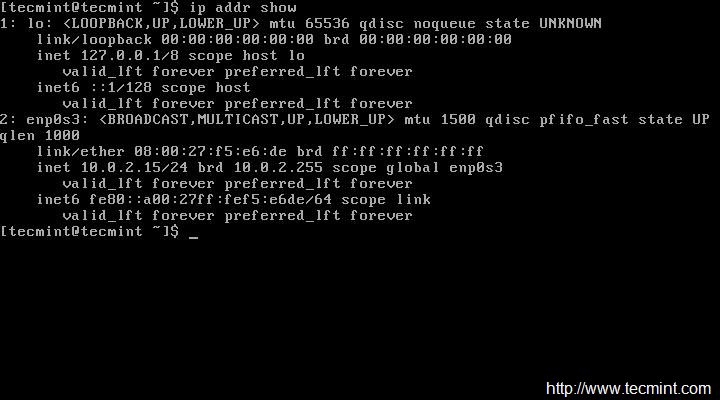
但正如我之前说,我们会使用 ip 命令来配置静态 IP 地址。所以,确认你首先检查了当前的 IP 地址。
|
|||
|
|
|
|||
|
|
# ip addr show
|
|||
|
|
|
|||
|
|
|
|||
|
|
|
|||
|
|
现在用你的编辑器打开并编辑文件 /etc/sysconfig/network-scripts/ifcfg-enp0s3。这里,我使用 Vi 编辑器,另外你要确保你是 root 用户才能保存更改。
|
|||
|
|
|
|||
|
|
# vi /etc/sysconfig/network-scripts/ifcfg-enp0s3
|
|||
|
|
|
|||
|
|
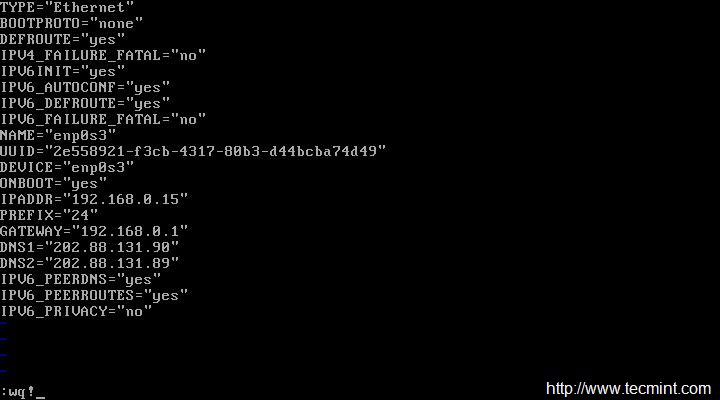
我们会编辑文件中的四个地方。注意下面的四个地方并保证不碰任何其它的东西。也保留双引号,在它们中间输入你的数据。
|
|||
|
|
|
|||
|
|
IPADDR = “[在这里输入你的静态 IP]”
|
|||
|
|
GATEWAY = “[输入你的默认网关]”
|
|||
|
|
DNS1 = “[你的域名系统 1]”
|
|||
|
|
DNS2 = “[你的域名系统 2]”
|
|||
|
|
|
|||
|
|
更改了 ‘ifcfg-enp0s3’ 之后,看起来像下面的图片。注意你的 IP,网关和 DNS 可能会变化,请和你的 ISP(译者注:互联网服务提供商商) 确认。保存并退出。
|
|||
|
|
|
|||
|
|
|
|||
|
|
网络详情
|
|||
|
|
|
|||
|
|
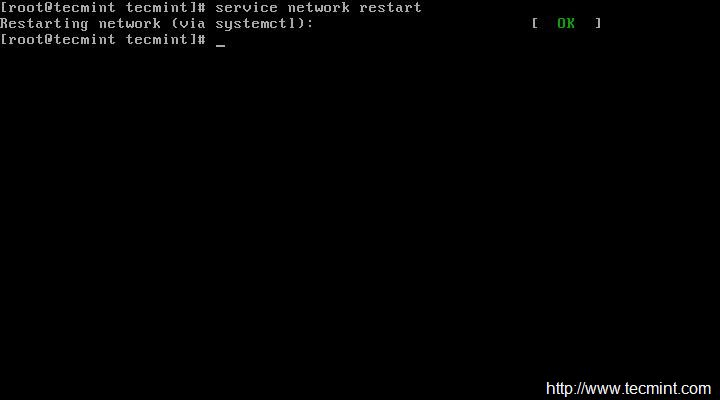
重启网络服务并检查 IP 是否和分配的一样。如果一切都顺利,用 Ping 查看网络状态。
|
|||
|
|
|
|||
|
|
# service network restart
|
|||
|
|
|
|||
|
|
|
|||
|
|
重启网络服务
|
|||
|
|
|
|||
|
|
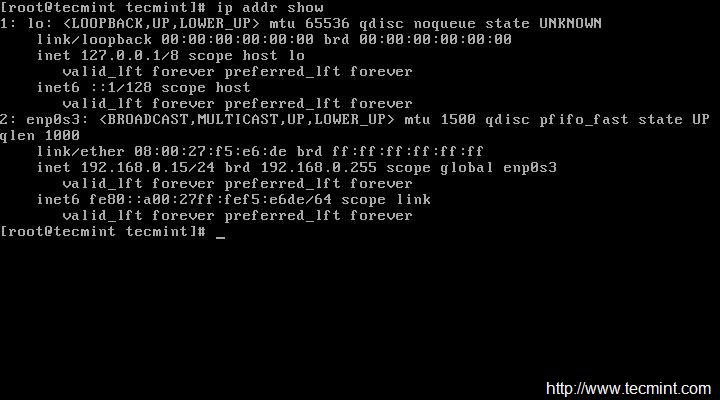
重启网络后,确认检查了 IP 地址和网络状态。
|
|||
|
|
|
|||
|
|
# ip addr show
|
|||
|
|
# ping -c4 google.com
|
|||
|
|
|
|||
|
|
|
|||
|
|
验证 IP 地址
|
|||
|
|
|
|||
|
|

|
|||
|
|
检查网络状态
|
|||
|
|
|
|||
|
|
### 3. 设置服务器的主机名称 ###
|
|||
|
|
|
|||
|
|
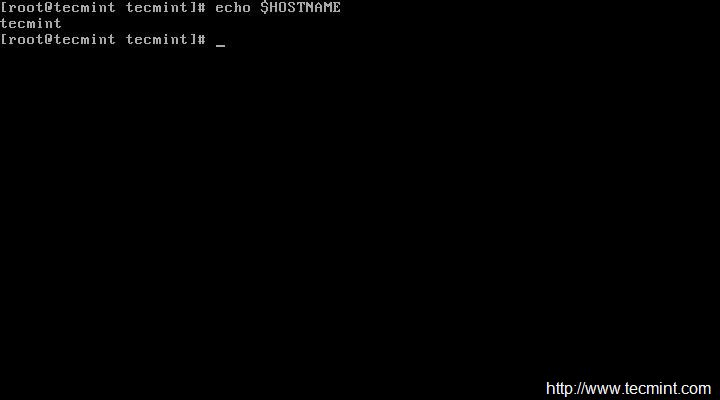
下一步是更改 CentOS 服务器的主机名称。查看当前分配的主机名称。
|
|||
|
|
|
|||
|
|
# echo $HOSTNAME
|
|||
|
|
|
|||
|
|
|
|||
|
|
查看系统主机名称
|
|||
|
|
|
|||
|
|
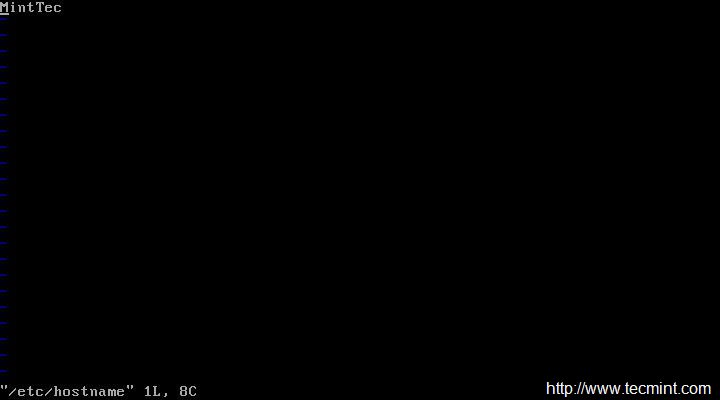
要设置新的主机名称,我们需要编辑 ‘/etc/hostsname’ 文件并用想要的名称替换旧的主机名称。
|
|||
|
|
|
|||
|
|
# vi /etc/hostname
|
|||
|
|
|
|||
|
|
|
|||
|
|
在 CentOS 中设置主机名称
|
|||
|
|
|
|||
|
|
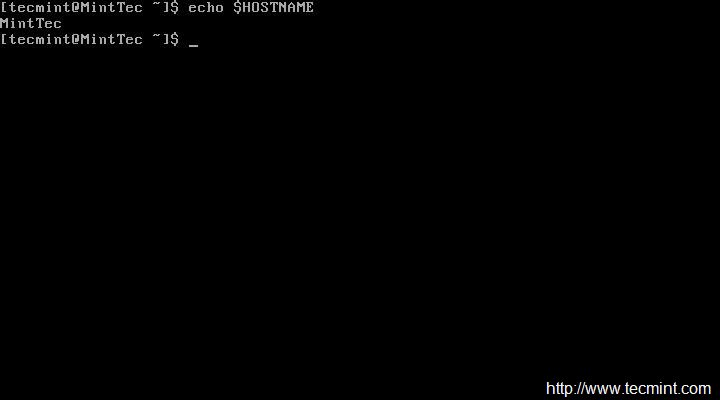
设置完了主机名称之后,务必注销后重新登录确认主机名称。登录后检查新的主机名称。
|
|||
|
|
|
|||
|
|
$ echo $HOSTNAME
|
|||
|
|
|
|||
|
|
|
|||
|
|
确认主机名称
|
|||
|
|
|
|||
|
|
你也可以用 ‘hostname’ 命令查看你当前的主机名。
|
|||
|
|
|
|||
|
|
$ hostname
|
|||
|
|
|
|||
|
|
### 4. 更新或升级最小化安装的 CentOS ###
|
|||
|
|
|
|||
|
|
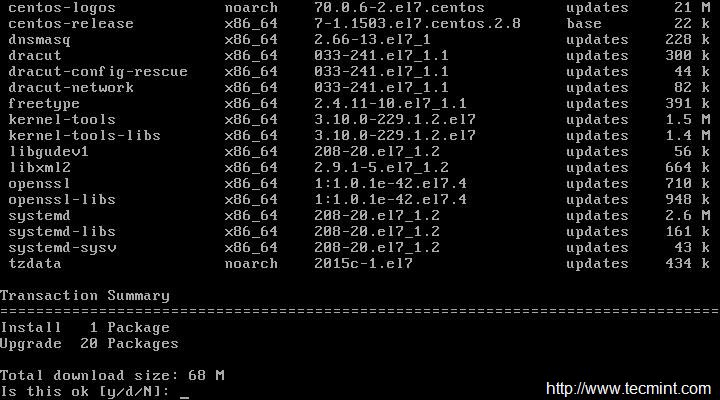
除了更新和安装已经有的软件的最新版本以及安全升级,这不会安装任何新的软件。总的来说更新和升级是相同的,除了事实上 升级 = 更新 + 更新时进行废弃处理。
|
|||
|
|
|
|||
|
|
# yum update && yum upgrade
|
|||
|
|
|
|||
|
|
|
|||
|
|
更新最小化安装的 CentOS 服务器
|
|||
|
|
|
|||
|
|
**重要**: 你也可以运行下面的命令,这不会弹出软件更新的提示,你也就不需要输入 ‘y’ 接受更改。
|
|||
|
|
|
|||
|
|
然而,查看服务器上会发生的变化总是一个好主意,尤其是在生产中。因此使用下面的命令虽然可以为你自动更新和升级,但并不推荐。
|
|||
|
|
|
|||
|
|
# yum -y update && yum -y upgrade
|
|||
|
|
|
|||
|
|
### 5. 安装命令行 Web 浏览器 ###
|
|||
|
|
|
|||
|
|
大部分情况下,尤其是在生产环境中,我们通常用没有 GUI 的命令行安装 CentOS,在这种情况下我们必须有一个能通过终端查看网站的命令行浏览工具。为了实现这个目的,我们打算安装名为 ‘links’ 的著名工具。
|
|||
|
|
|
|||
|
|
# yum install links
|
|||
|
|
|
|||
|
|

|
|||
|
|
Links: 命令行 Web 浏览器
|
|||
|
|
|
|||
|
|
请查看我们的文章 [用 links 工具命令行浏览 Web][4] 了解用 links 工具浏览 web 的方法和例子。
|
|||
|
|
|
|||
|
|
### 6. 安装 Apache HTTP 服务器 ###
|
|||
|
|
|
|||
|
|
不管你因为什么原因使用服务器,大部分情况下你都需要一个 HTTP 服务器运行网站、多媒体、用户端脚本和很多其它的东西。
|
|||
|
|
|
|||
|
|
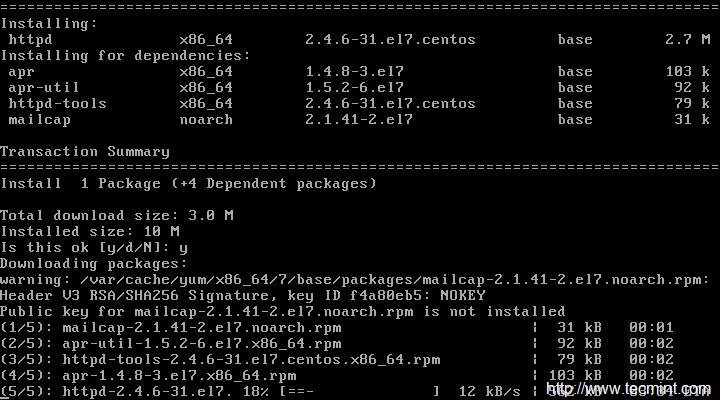
# yum install httpd
|
|||
|
|
|
|||
|
|
|
|||
|
|
安装 Apache 服务器
|
|||
|
|
|
|||
|
|
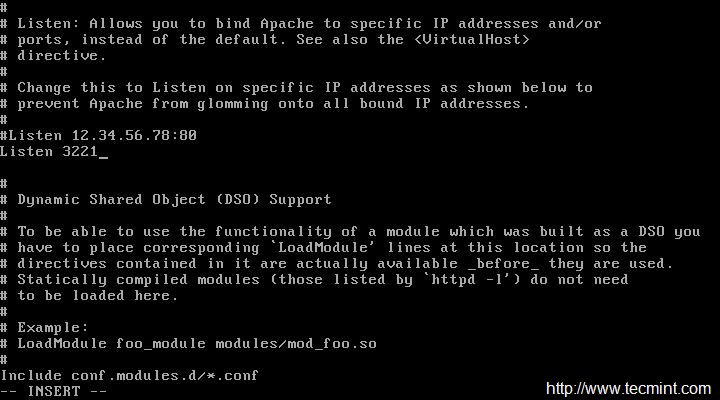
如果你想更改 Apache HTTP 服务器的默认端口号(80)为其它端口,你需要编辑配置文件 ‘/etc/httpd/conf/httpd.conf’ 并查找以下面开始的行:
|
|||
|
|
|
|||
|
|
LISTEN 80
|
|||
|
|
|
|||
|
|
把端口号 ‘80’ 改为其它任何端口(例如 3221),保存并退出。
|
|||
|
|
|
|||
|
|
|
|||
|
|
更改 Apache 端口
|
|||
|
|
|
|||
|
|
增加刚才分配给 Apache 的端口通过防火墙,然后重新加载防火墙。
|
|||
|
|
|
|||
|
|
允许 http 服务通过防火墙(永久)。
|
|||
|
|
|
|||
|
|
# firewall-cmd –add-service=http
|
|||
|
|
|
|||
|
|
允许 3221 号端口通过防火墙(永久)。
|
|||
|
|
|
|||
|
|
# firewall-cmd –permanent –add-port=3221/tcp
|
|||
|
|
|
|||
|
|
重新加载防火墙。
|
|||
|
|
|
|||
|
|
# firewall-cmd –reload
|
|||
|
|
|
|||
|
|
完成上面的所有事情之后,是时候重启 Apache HTTP 服务器了,然后新的端口号才能生效。
|
|||
|
|
|
|||
|
|
# systemctl restart httpd.service
|
|||
|
|
|
|||
|
|
现在添加 Apache 服务到系统层使其随系统自动启动。
|
|||
|
|
|
|||
|
|
# systemctl start httpd.service
|
|||
|
|
# systemctl enable httpd.service
|
|||
|
|
|
|||
|
|
如下图所示,用 links 命令行工具 验证 Apache HTTP 服务器。
|
|||
|
|
|
|||
|
|
# links 127.0.0.1
|
|||
|
|
|
|||
|
|

|
|||
|
|
验证 Apache 状态
|
|||
|
|
|
|||
|
|
--------------------------------------------------------------------------------
|
|||
|
|
|
|||
|
|
via: http://www.tecmint.com/things-to-do-after-minimal-rhel-centos-7-installation/
|
|||
|
|
|
|||
|
|
作者:[Avishek Kumar][a]
|
|||
|
|
译者:[ictlyh](https://github.com/ictlyh)
|
|||
|
|
校对:[校对者ID](https://github.com/校对者ID)
|
|||
|
|
|
|||
|
|
本文由 [LCTT](https://github.com/LCTT/TranslateProject) 原创翻译,[Linux中国](http://linux.cn/) 荣誉推出
|
|||
|
|
|
|||
|
|
[a]:http://www.tecmint.com/author/avishek/
|
|||
|
|
[1]:http://www.tecmint.com/centos-7-installation/
|
|||
|
|
[2]:http://www.tecmint.com/redhat-enterprise-linux-7-installation/
|
|||
|
|
[3]:http://www.tecmint.com/enable-redhat-subscription-reposiories-and-updates-for-rhel-7/
|
|||
|
|
[4]:http://www.tecmint.com/command-line-web-browsers/
|