2. [Change the Grub splash screen by using the GUI][2]
3. [Change the Grub splash screenon the command line][3]
**What is a Splash screen?**
A splash screen is nothing but the picture that's gets displayed in the background while booting the Linux operating system. You might be knowing thatGrub (**GR**and**U**nified**B**ootloader) is the commonly used famous bootloader among major Linux distributions. If you take Redhat as an example, it displays a blank or black background during the booting of the system.
The splash screen definitions are defined in the grub.conf file and the splash screen image file resides in the /boot partition. If you are bored of the default blank screen and want to change it to whatever you like, then just perform the steps below to change it.
### What we need to proceed.
1\. ImageMagick (Only required For command Line Method): or GIMP (For GUI Method)
2\. A sample image.
###
Change the Grub splash screen by using the GUI
Let's proceed with the GUI method in which we will use GIMP as image editor.
**Step 1**. Open the image using GIMP (follow the path; Applications --> Graphics --> GNU Image Manipulation Program )
**Step 2**. Now we need to scale the image size to 640 x 480 for proper implementation. For this,go to option Image--> Scale Image. Keep in mind below specs for this. Change Width to 640 and Height to 480\. Do not change rest of the things.
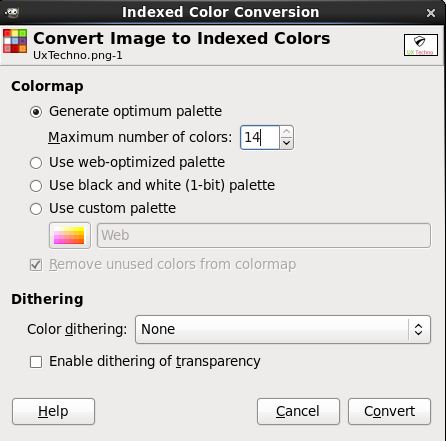
**Step 3:**Then we need to index our image so that only 14 colors are used. To do this, go to option Image --> Mode --> Indexed. Tick the "generate optimum palette" option and enter 14 as themaximum number of colors (as shown below).
[
][5]
Click on the convert Button.
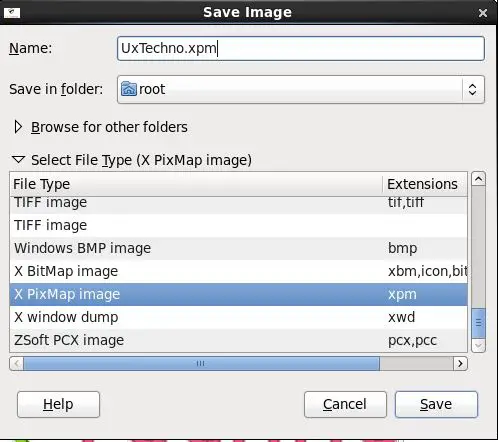
**Step 4:**Save the file. I'll use the name "UxTechno.xpm" below:
[
][6]
**Step 5:**Zip the file. To do this, go to the location of thefile --> Right click on it and select the "Compress" Option. Then select "gzip" as compression method:
**Step 6:**Now copy or move "UxTechno.xpm.gz" file to the location /boot/grub/UxTechno.xpm.gz
**Step 7:**Now edit the line splashimage parameter in the/boot/grub/grub.confFile as shown below and save the file. The final content shall look like this:
```
# grub.conf
generated by anaconda
#
# Note that you do not have to rerun grub after making changes to this file
# NOTICE: You have a /boot partition. This means
that # all kernel and initrd paths are relative to /boot/, eg. # root
### Change the Grub splash screenon the command line
If you are abig fan of thecommand line, then follow this method.
**Step 1:**
Before proceeding, we need to change the image pixel resolution. For this purpose, we should have the ImageMagick software installed on the Linux system. Cross check this using below command on CentOS / RHEL.
rpm -qa|grep -i ImageMagick
IWhen the command returns no (blank) output, then this means you don't have ImageMagick installed on your system. You have to install it using the below command.
yum install ImageMagick
When you recheck, you will get similar output as below:
rpm -qa|grep -i ImageMagick
ImageMagick-6.5.4.7-5.el6.x86_64
So let's proceed with the configuration. I have taken the UxTechno Logo as splash screen image.
**Step 2:**Covert the pixel depth using below command:
**Step 5:**Change thesplashimageparameter in the/boot/grub/grub.conffile as below & save the file.
```
splashimage=(hd0,0)/grub/uxtechno_logo.xpm
```
**Step 6:**Finally reboot the server using the reboot command. The boot screen will display the splash image as shown in step 7 of the GUI install procedure.