mirror of
https://github.com/LCTT/TranslateProject.git
synced 2025-01-04 22:00:34 +08:00
77 lines
4.6 KiB
Markdown
77 lines
4.6 KiB
Markdown
|
|
用 autoplank 在多个显示器上使用 Plank 扩展坞
|
|||
|
|
======
|
|||
|
|
|
|||
|
|

|
|||
|
|
|
|||
|
|
[autoplank][1] 是用 Go 语言编写的小型工具,它为 Plank 扩展坞增加了多显示器支持,而无需创建[多个][2]扩展坞。
|
|||
|
|
|
|||
|
|
当你将鼠标光标移动到显示器的底部时,`autoplank` 会使用 `xdotool` 检测到你的鼠标移动,并且自动将 Plank 扩展坞移动到该显示器。该工具仅在将 Plank 设置为在屏幕底部的情况下工作(至少目前如此)。
|
|||
|
|
|
|||
|
|
在 Plank 实际出现在鼠标所在的显示器上前会稍有延迟。开发人员说这是有意设计的,以确保你确实要在该显示器上访问 Plank。显示 Plank 之前的时间延迟目前尚不可配置,但将来可能会改变。
|
|||
|
|
|
|||
|
|
`autoplank` 可以在 elementary OS 以及其它的桌面环境或发行版上使用。
|
|||
|
|
|
|||
|
|
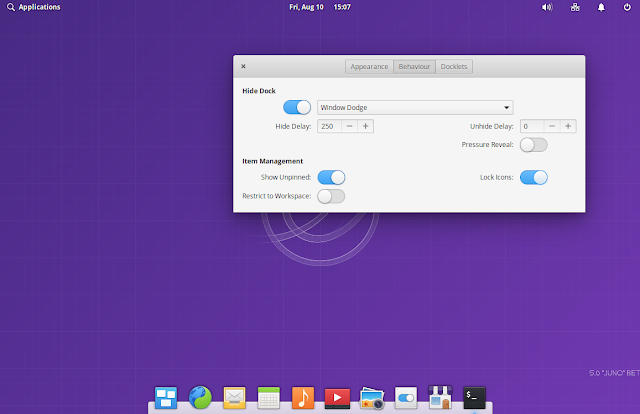
Plank 是一个简单的扩展坞,它显示了正在运行的应用程序/窗口的图标。它允许将应用程序固定到扩展坞,并带有一些内置的简单“扩展组件”:剪贴板管理器、时钟、CPU 监视器、显示桌面和垃圾桶。要访问其设置,请按住 `Ctrl` 键,同时右键单击 Plank 扩展坞上的任意位置,然后单击 “Preferences”。
|
|||
|
|
|
|||
|
|
Plank 默认用在 elementary OS 中,但也可以在任何桌面环境或 Linux 发行版中使用。
|
|||
|
|
|
|||
|
|
### 安装 autoplank
|
|||
|
|
|
|||
|
|
在其 GitHub 页面上,提到你需要 Go 1.8 或更高版本才能构建 `autoplank`,但我能够在 Ubuntu 16.04(elementary OS 0.4 Loki)中使用 Go 1.6 成功构建它。
|
|||
|
|
|
|||
|
|
开发者说:
|
|||
|
|
|
|||
|
|
1、安装所需的依赖项。
|
|||
|
|
|
|||
|
|
要构建 `autoplank`,你需要 Go(在 Debian、Ubuntu、elementary OS 等中使用 golang-go)。要获取最新的 Git 代码,你还需要 `git`,要在显示器上检测你的鼠标移动,还需要安装 `xdotool`。
|
|||
|
|
|
|||
|
|
使用以下命令将它们安装在 Ubuntu、Debian、elementary OS 等中:
|
|||
|
|
|
|||
|
|
```
|
|||
|
|
sudo apt install git golang-go xdotool
|
|||
|
|
```
|
|||
|
|
|
|||
|
|
2、从 [Git][1] 获取最新的 `autoplank`,构建并将其安装在 `/usr/local/bin` 中:
|
|||
|
|
|
|||
|
|
```
|
|||
|
|
git clone https://github.com/abiosoft/autoplank
|
|||
|
|
cd autoplank
|
|||
|
|
go build -o autoplank
|
|||
|
|
sudo mv autoplank /usr/local/bin/
|
|||
|
|
```
|
|||
|
|
|
|||
|
|
你现在可以从主目录中删除 `autoplank` 文件夹。
|
|||
|
|
|
|||
|
|
当你想卸载 `autoplank` 时,只需删除 `/usr/local/bin/autoplank` 二进制文件(`sudo rm /usr/local/bin/autoplank`)。
|
|||
|
|
|
|||
|
|
3、将 `autoplank` 添加到启动中。
|
|||
|
|
|
|||
|
|
如果你想在将 `autoplank` 添加到启动项或为其创建 systemd 服务之前尝试使用 `autoplank`,则只需在终端中键入 `/usr/local/bin/autoplank` 即可启动它。
|
|||
|
|
|
|||
|
|
要使 `autoplank` 在重新启动后起作用,你需要将其添加到启动项中。确切的操作步骤取决于你的桌面环境,因此我不会确切告诉你如何在每个桌面环境中执行此操作,但是请记住在启动项中将 `/usr/local/bin/autoplank` 设置为可执行文件。
|
|||
|
|
|
|||
|
|
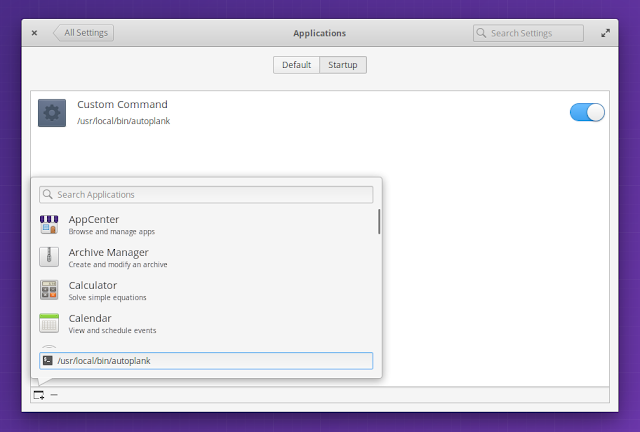
在 elementary OS 中,你可以打开“系统设置”,然后在“应用程序”的“启动”选项卡上,单击窗口左下角的“+”按钮,然后在“键入自定义命令”字段中添加 “/usr/local/bin/autoplank”:
|
|||
|
|
|
|||
|
|

|
|||
|
|
|
|||
|
|
如[此处][3]的解释,使用 `autoplank` 的另一种方法是通过为其创建 systemd 服务。将 systemd 服务用于 autoplank 的优点是,无论它出于何种原因而崩溃,都可以重新启动 `autoplank`。可以使用 systemd 服务或将 `autoplank` 添加到启动应用程序中(但不要同时使用两者)。
|
|||
|
|
|
|||
|
|
4、完成此操作后,注销、登录,`autoplank` 应该已在运行,因此你可以将鼠标移至显示器底部以将 Plank 停靠此处。
|
|||
|
|
|
|||
|
|
--------------------------------------------------------------------------------
|
|||
|
|
|
|||
|
|
via: https://www.linuxuprising.com/2018/08/use-plank-on-multiple-monitors-without.html
|
|||
|
|
|
|||
|
|
作者:[Logix][a]
|
|||
|
|
选题:[lujun9972](https://github.com/lujun9972)
|
|||
|
|
译者:[wxy](https://github.com/wxy)
|
|||
|
|
校对:[wxy](https://github.com/wxy)
|
|||
|
|
|
|||
|
|
本文由 [LCTT](https://github.com/LCTT/TranslateProject) 原创编译,[Linux中国](https://linux.cn/) 荣誉推出
|
|||
|
|
|
|||
|
|
[a]:https://plus.google.com/118280394805678839070
|
|||
|
|
[1]:https://github.com/abiosoft/autoplank
|
|||
|
|
[2]:https://answers.launchpad.net/plank/+question/204593
|
|||
|
|
[3]:https://github.com/abiosoft/autoplank#optional-create-a-service
|
|||
|
|
[4]:https://www.reddit.com/r/elementaryos/comments/95a879/autoplank_use_plank_on_multimonitor_setup/e3r9saq/
|